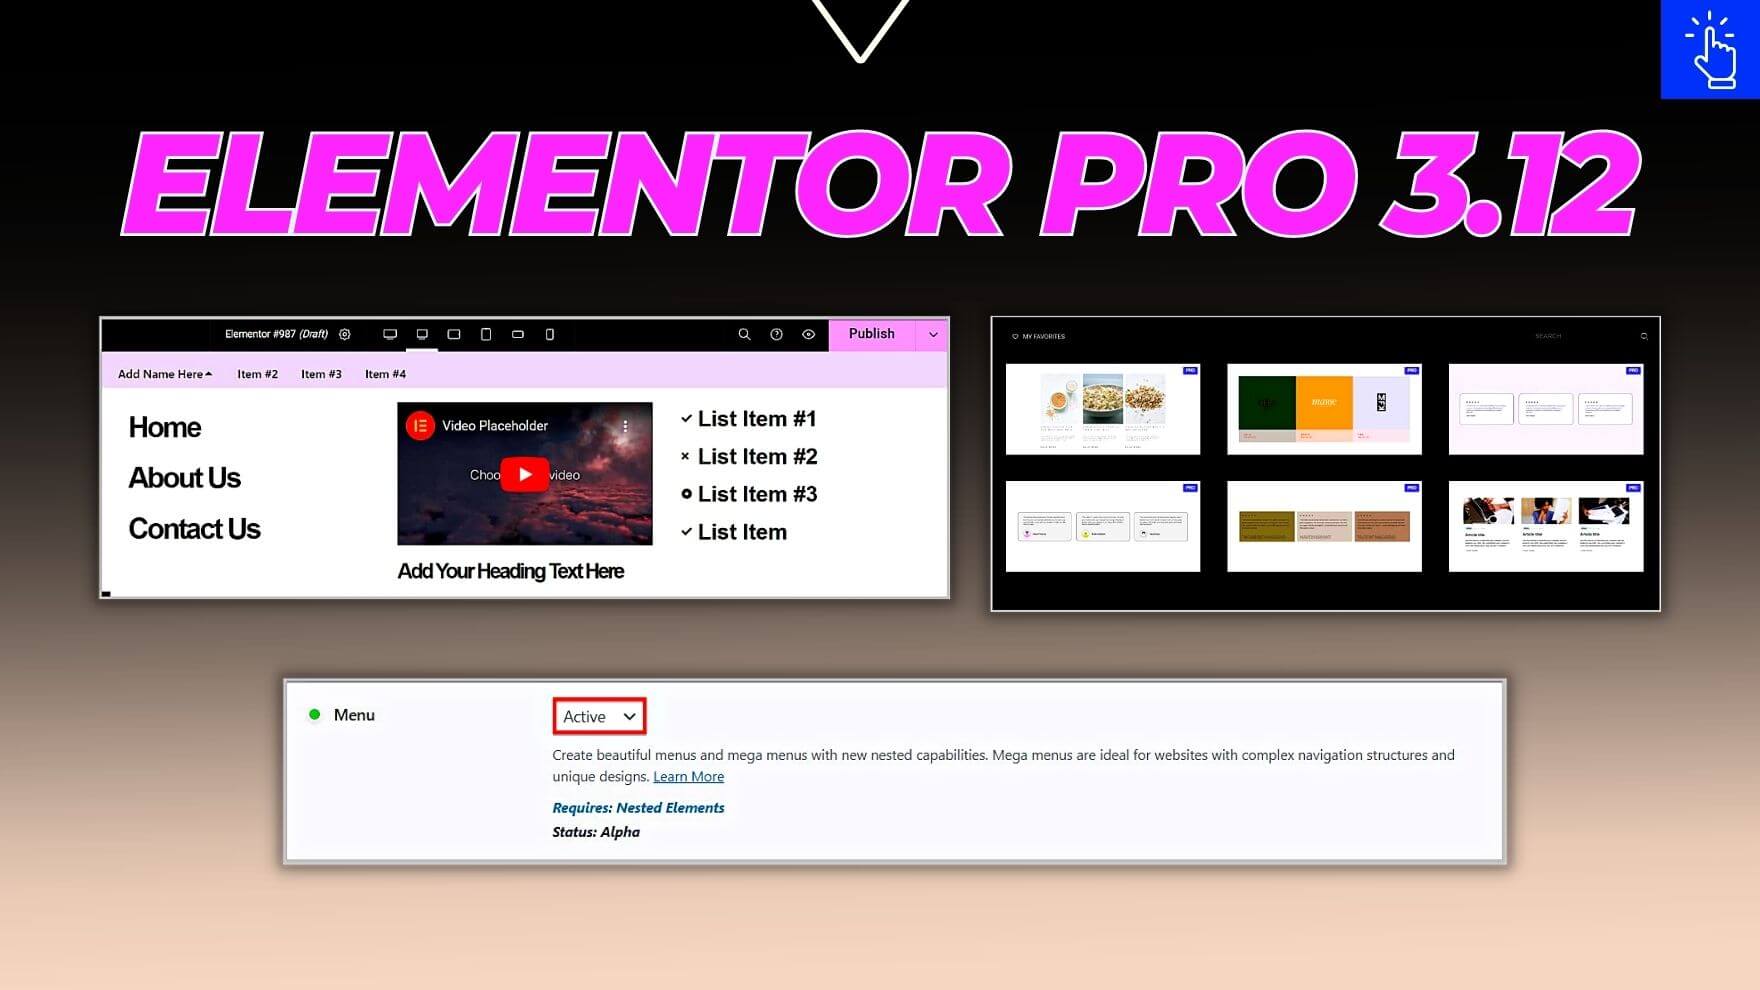
What’s New in Elementor Pro 3.12
In our previous article we have touched on Elementor 3.12.
And in this article we are going to discuss what’s new in Elementor Pro 3.12 update.
First things first, this update is for the premium version of the plugin.
And this means, if you have a Pro or Elementor Cloud Website subscription then only you will be able to access the new features included.
As far as the features are concerned, Elementor Pro 3.12 comes with one of the most awaited feature which is the Mega Menu.
And part from this quite a few improvements for Loop Grid, Loop Carousel and Menu Cart widget have been released including pre-built container based templates for loop.
Keeping this in mind, if you are looking to give Elementor Pro 3.12 a try then you can do so by clicking our SPECIAL LINK or the button below.
Elementor Pro 3.12 Update
Before we learn more about Elementor Pro 3.12, it is important to know that this update was released on 29th March 2023.
And below are the topics covered.
New Menu Widget
If you have been using Elementor Pro to create sites then you must be familiar with the fact that, Elementor comes with a Navigation Menu widget that allows you to select or add a menu that you have created in WordPress.
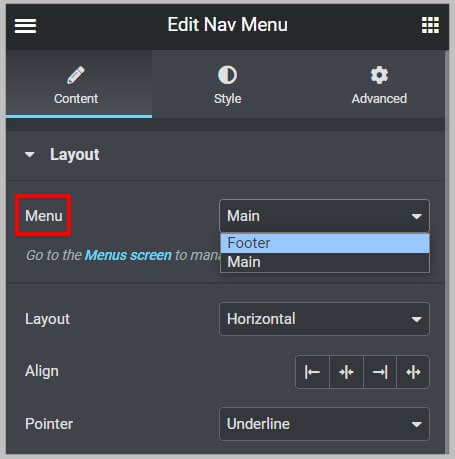
The menu created is pretty basic and if you are looking to add custom items then there is no easy way to do this.
Generally, an alternative approach is to use the Icon List widget as it allows you to add items and link them to various pages.
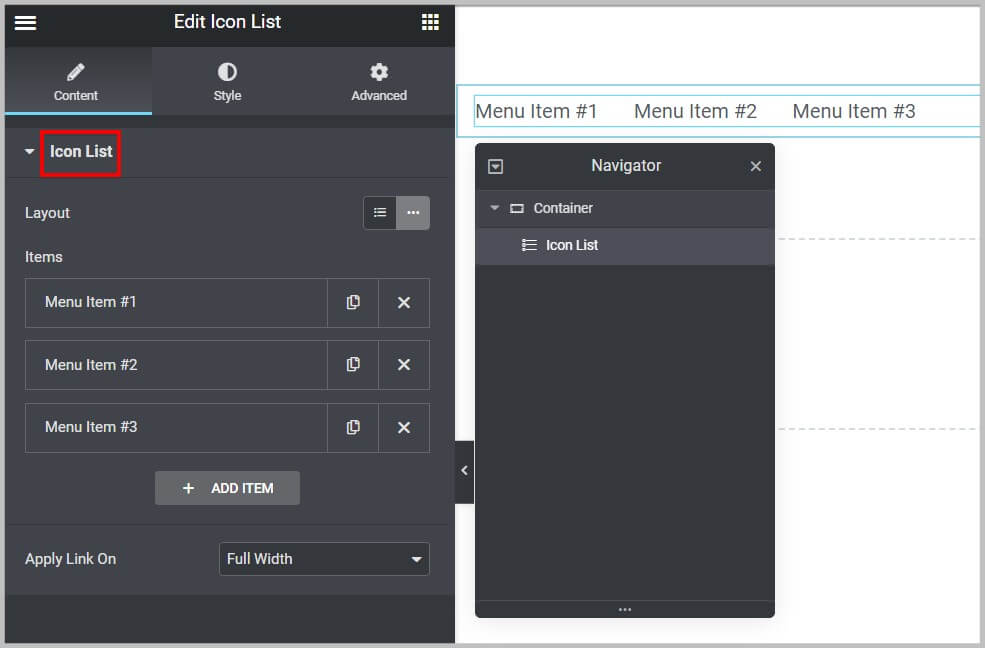
It is important to know that, this process may sound simple to execute, however, in reality, when it comes to making the menu created responsive, it can be a real nightmare as there is no easy or straight forward way to do it.
Keeping this in mind, in Elementor Pro 3.12, a new Menu widget has been introduced
And this widget will simplify creating menus using Elementor.
The new Menu widget has been released an experiment and it comes disabled by default.
Apart from this it requires you to enable multiple features in Elementor and these are.
- Flexbox Container
- Nested Elements
- Menu
Remember, Menu requires Nested Elements feature.

And Nested Elements require Flexbox Container.

Before we move forward, it is important to know that Menu is a feature whose status is Alpha.

And hence, we suggest using this feature on a test site or a local environment first.
Having said that,
To enable these features, you will have to click Settings under Elementor in your WordPress dashboard.
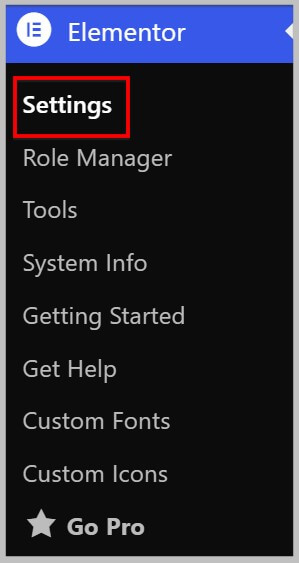
And in the next step, you need to click Features tab.
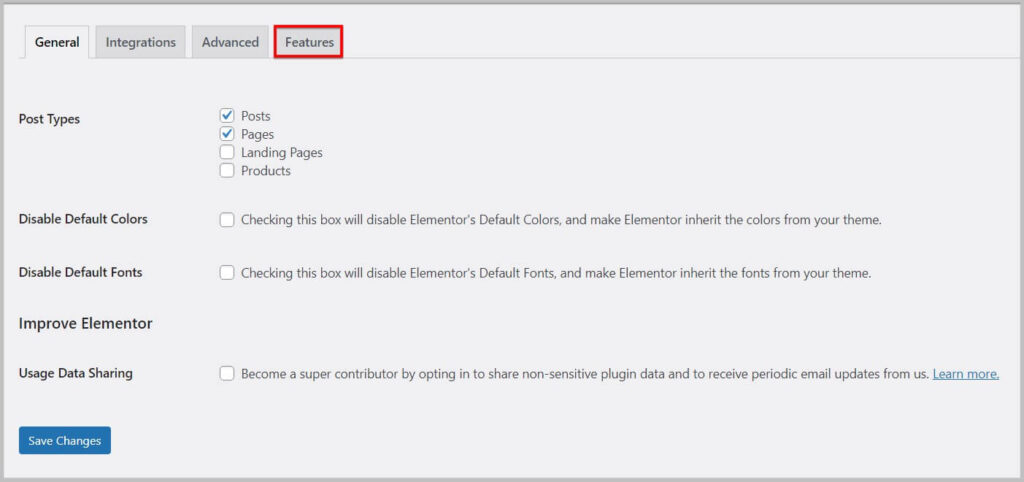
Doing this will show you all the experimental features and here under ongoing experiments you will find Flexbox Container.
To activate Flexbox Container in Elementor, you need to select Active in the dropdown and Save changes.

Please note- Once the flexbox container feature is active, you will not find inner section widget in Elementor as it will be replaced by Container.
In the next step, you need to active Nested Elements feature in Elementor.
And for this you will have to select Active in the Nested Elements dropdown.

It is important to know that Nested Elements feature was introduced in Elementor 3.10 and it you access to the new Tab widget.
Moving on,
The next feature that you will have to enable is Menu.
And to activate Menu in Elementor, you will have to select Active in the dropdown just like before and Save changes.

Once you have enabled the menu feature, you will get access to the new Menu widget in Elementor Pro.
And you will find it under Site widgets in Elementor editor.
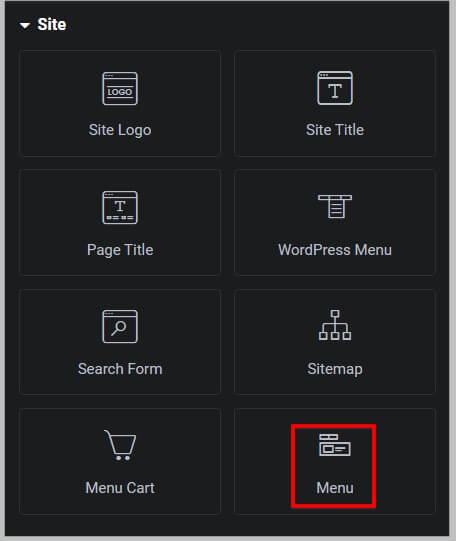
On adding this widget, you will see it generates a menu with a few items.
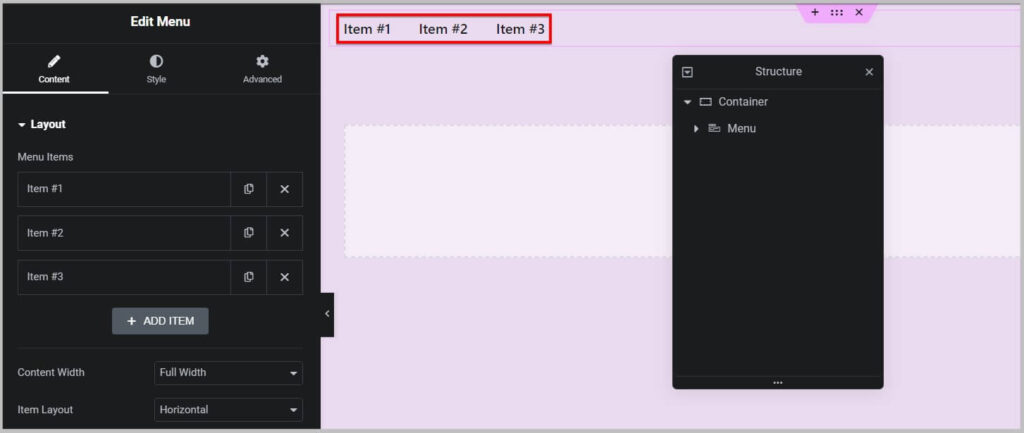
And under the layout on the left, you get the option to add more menu items.
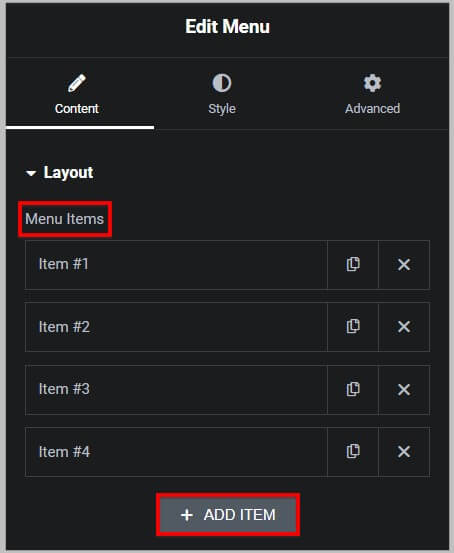
Here you will have to just click Add Items and it will automatically add a new menu item.
After this, the next step is to change the menu item names or titles and add links.
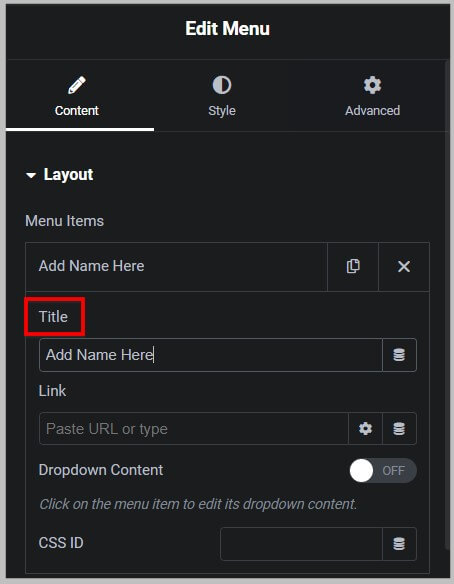
For this, you will have to click the menu item tab under Layout and the first option will allow you to change title or name.
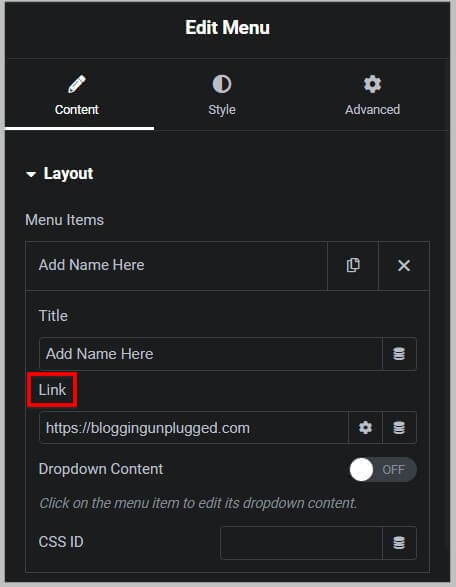
Just below it, you will the option to add a link to this menu item and if you want to open it in a new tab or want to add nofollow or a custom attributes then you will have to click the gear icon.
Moving on,
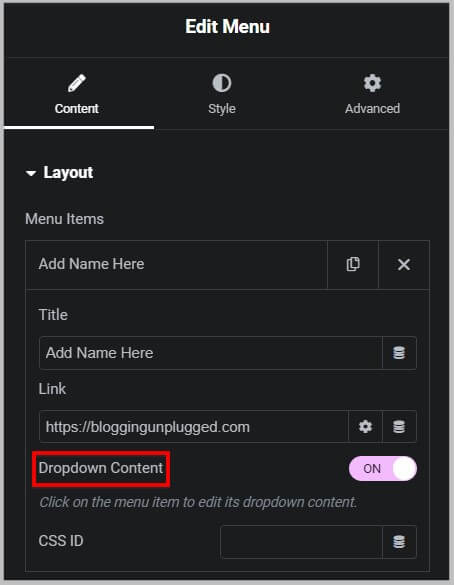
The next option that you will see is Dropdown content and enabling this option will allow you add sub menu items.
In other words, this menu item will have additional items that will appear when a user clicks or hovers over it.
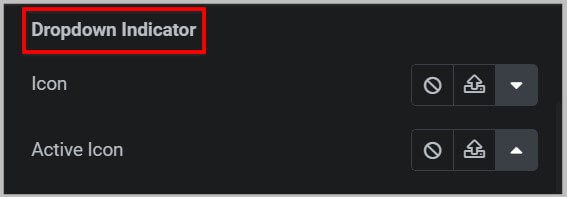
If you want to change the dropdown icon then you will find the option to do so under the dropdown indicator.
Now to change on which action the dropdown menu opens, you need to visit the Dropdown Effect tab.
And the first option Open on allows you select if you want to open it on Hover or Click.
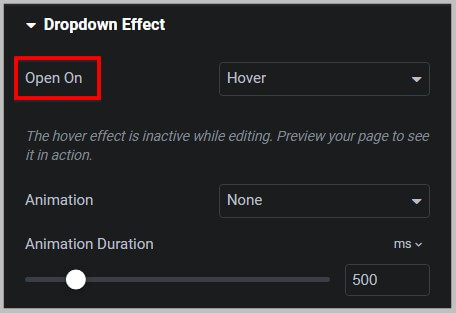
Apart from this, you can change animation and its duration as well.
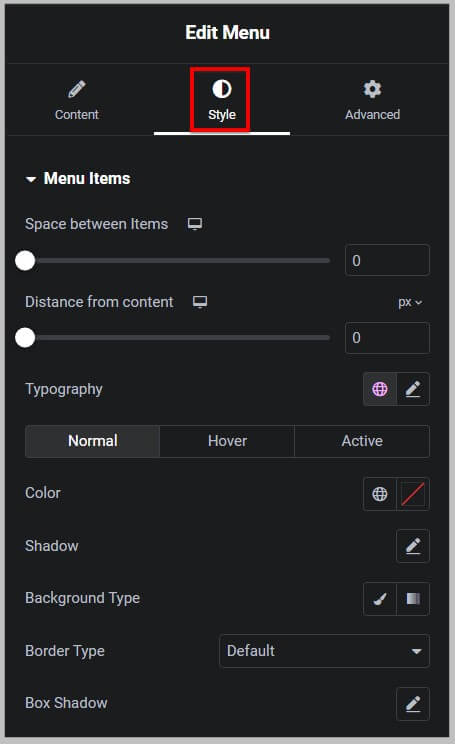
To style the menu, you will have to visit the Style tab and there you will find all the options.
Mega Menu in Elementor Pro 3.12
Now that you are somewhat familiar with the new Menu widget, the next new feature that has been released in Elementor Pro 3.12 is the Mega Menu.
This is one of the most requested feature and until now if you had to create a mega menu using Elementor then you had to use third party plugins or Elementor addons.
And in case you you just want to use Elementor Pro then you had to use popups.
This process was not very straight forward and thus using an Elementor Addon was the recommended way forward.
Keeping this in mind, in Elementor Pro 3.12, mega menu feature has been introduced and to use it all you have to do is activate dropdown in the menu item.

And once you have it enabled it, you need to click the menu item and it will show you a blank canvas.

On this blank canvas you can add any Elementor widget and create a custom layout as per your requirements.

Having a blank canvas under a menu item gives you complete freedom / control over the design.
It is important to know that you can activate this dropdown in more than one or all menu items as well.
And you can add any widget in the new menu dropdown area.
All in all, you have complete control and freedom over design.
Loop Feature
Moving on from the menu widget,
The next change that you will come across in Elementor Pro 3.12 update is for the Loop feature.
This feature was released in Elementor Pro 3.8 update and it allows you to build custom list of products, pages and posts which can be tailored dynamically based on your specifications and you can customize its appearance as well.
Before we learn more about this change, it is important to know that recently we came across a post on social media platform where someone had mentioned about missing loop feature in Elementor.
It is important to know that, in case you cannot find Loop under Features tab in Elementor settings then you are most likely using the free version of the plugin.
And to get access to this feature you will have to upgrade to Elementor Pro.
Another thing, that you will have to know here is that if you are using the Pro version and Loop Carousel and Loop grid widgets are missing then chances are you have accidentally deactivated this feature.
And to fix it, you will have to activate Loop feature in Elementor.

Keeping this in mind, the first change that has been introduced for the Loop feature in Elementor Pro 3.12 is that, it has been promoted to stable.
- Before Elementor 3.12

- After Elementor 3.12

Pre-built Loop Templates
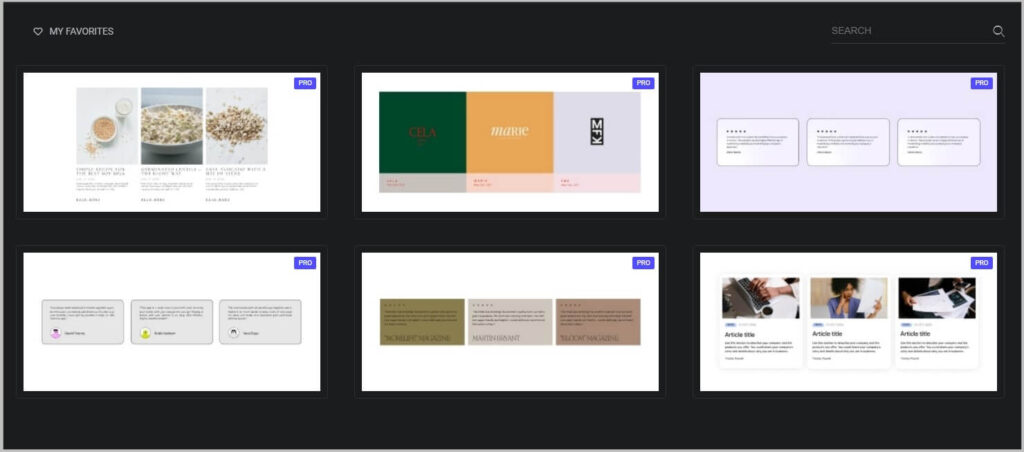
The next improvement that you will come across for the loop feature in Elementor Pro 3.12 is the introduction of pre-built templates.
For right now, 6 templates for Posts and 4 for Woocommerce products have been released.
- Posts
- Woocommerce Products
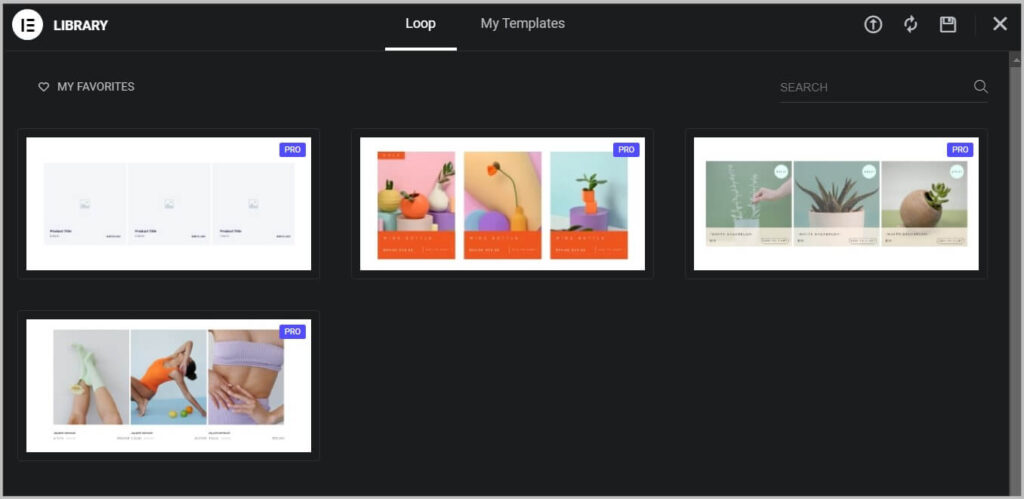
As mentioned before, the templates are container-based, hence it is required that you have flexbox container feature enabled.
Now, to use these pre-built loop templates, the first step is to choose a template types in the Loop Grid or Carousel widget.
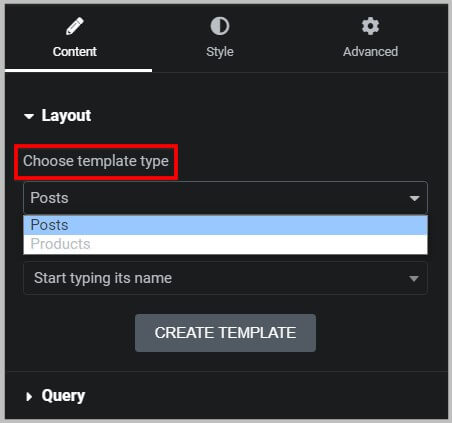
Remember, if you have selected Posts then templates for Posts will be visible and choosing Products will show you templates for Woocommerce products.
Keeping this in mind, in the next step you need to click Create a template and it will show you the option to Add a template.
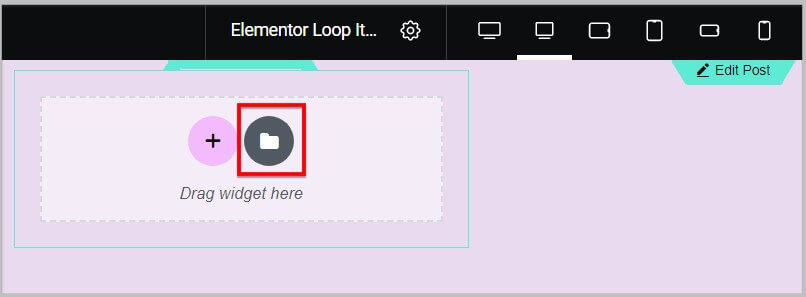
Clicking this option will show you all the pre-built Loop templates in the library.
And to use, you have to select a template and click Insert.
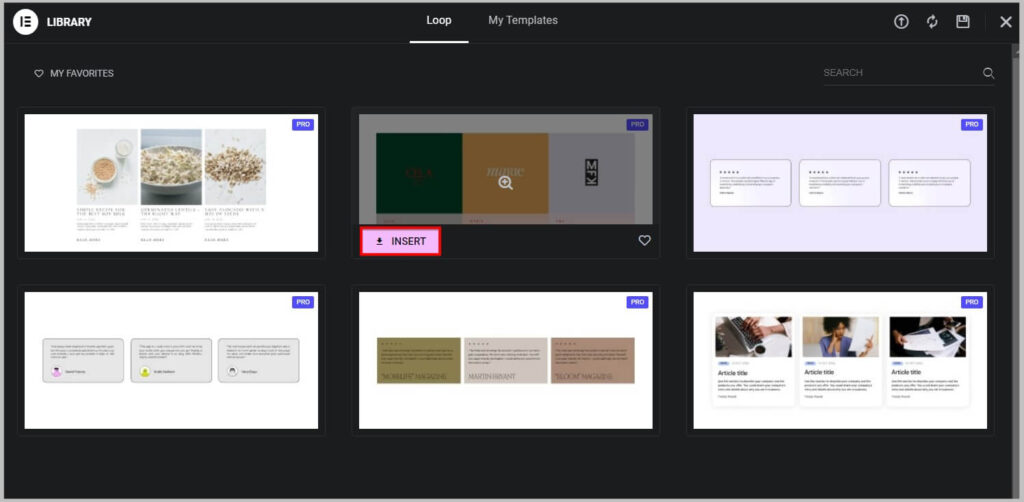
Just like using any other template or website kit, it requires you to connect to Elementor template library.
And once the template is inserted, you can customize it as per your requirements.
Custom CSS in Loop Template
While we are on the topic of Loop templates, it is important to know that in Elementor Pro 3.12 update, Custom CSS option has been added to it.
And you will find this option in Loop Item settings under Advanced tab.
- Before Elementor Pro 3.12
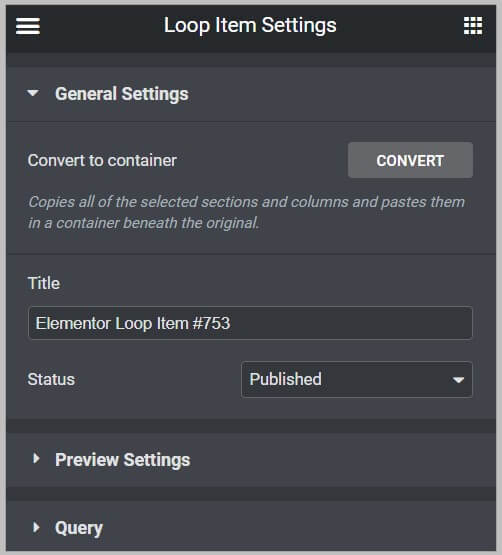
- After Elementor Pro 3.12
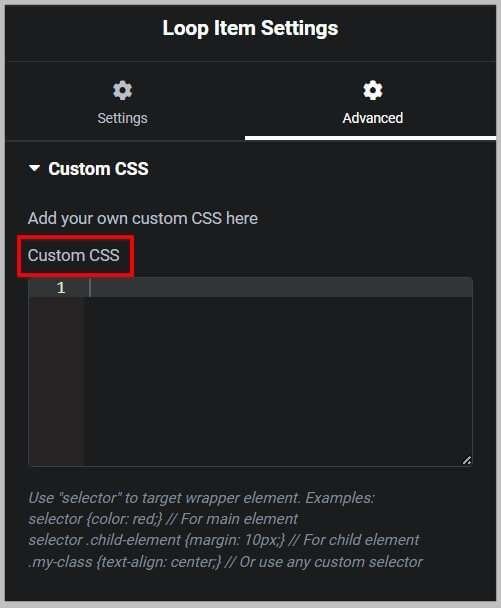
Alternate Loop Template
Moving on from Custom CSS, the next improvement that you will come across is the option use an alternate template in the Loop Grid widget.
As the name suggests, this feature allows you to use multiple templates in a Loop Grid and you can select positioning and make other changes as per your needs.
It is important to know that this feature is only available in Loop Grid widget and not in Loop Carousel.
Having said that,
You will find this option under Layout
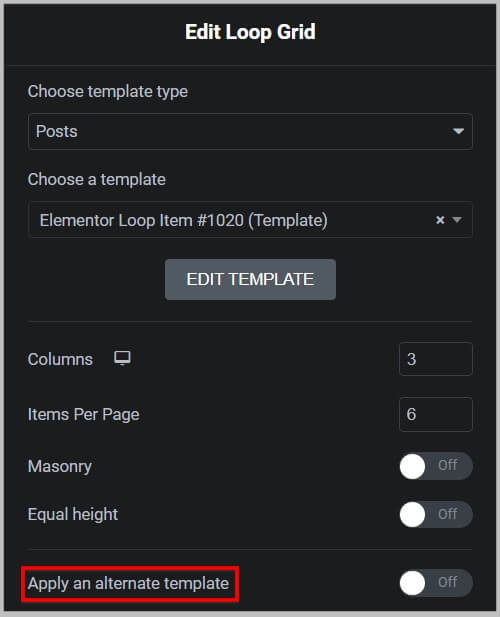
And on enabling, it will allow you to choose a template or create a new one.
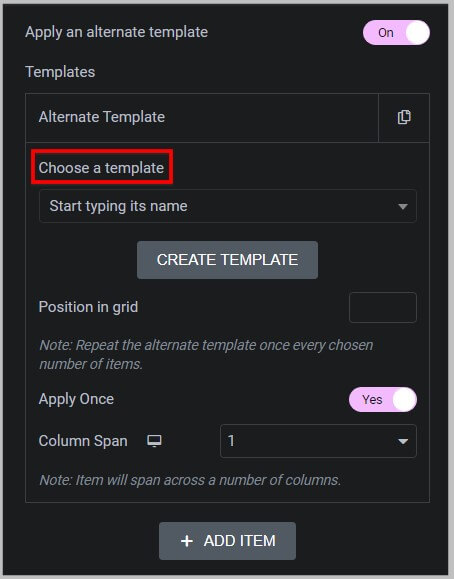
Once done, you can select position on which you want to display it in the grid and if you want it to appear multiple times.
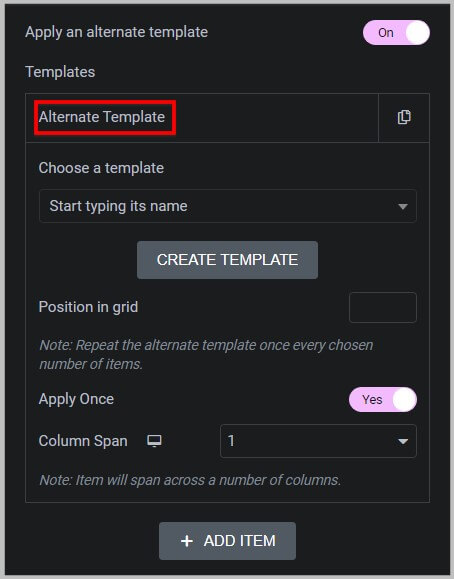
Apart from this, you can have multiple Alternate Loop templates and if you want to add more then will have to just click Add Item.
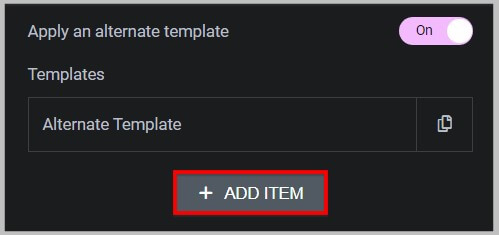
And the rest of the settings are exactly the same.
Spacing Control in Loop Carousel widget
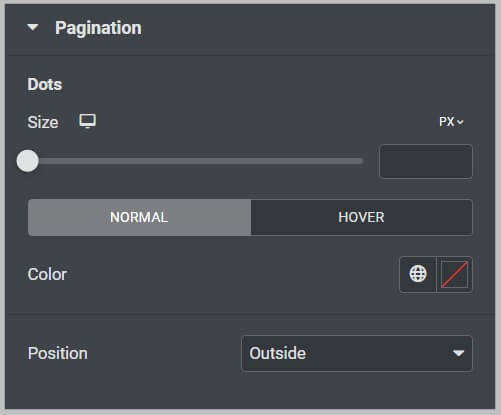
After the alternate template, the next improvement that you will come across is the additional of spacing control between navigation and slides.
To see this change you will have to navigate to Style tab in the Loop Carousel widget and under the Pagination tab you will find the spacing control.
- Before Elementor Pro 3.12
- After Elementor Pro 3.12
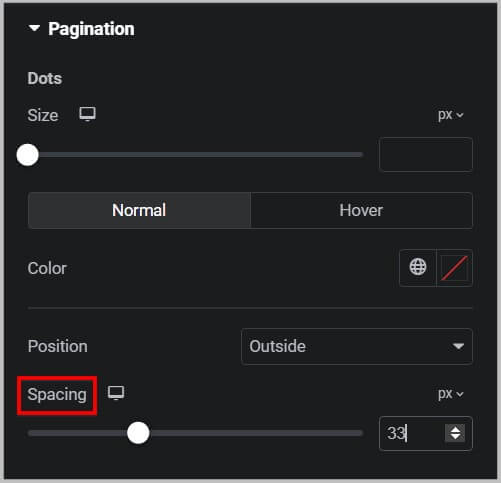
It is important to know that, this spacing option comes with responsive controls as well and using it you will be able to make changes according to different screensizes.
Responsive controls
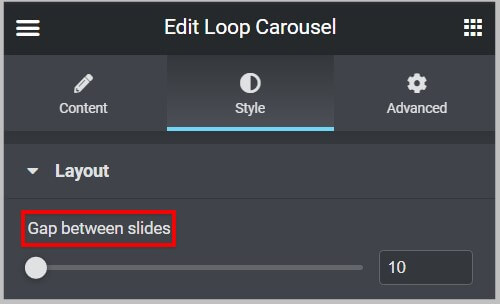
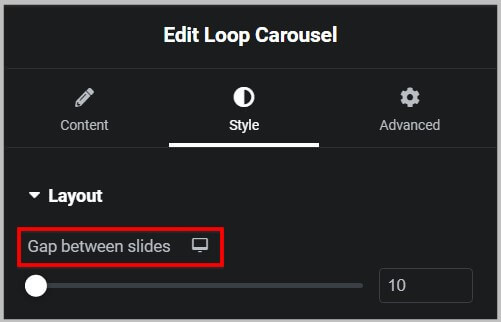
While we are on the topic of responsive controls in Loop Carousel widget, it is important to know that these controls have been added to Gap between slides option in Elementor Pro 3.12.
You will find this option under Layout in Loop Carousel Style settings.
- Before Elementor Pro 3.12
- After Elementor Pro 3.12
Menu cart in Elementor pro 3.12
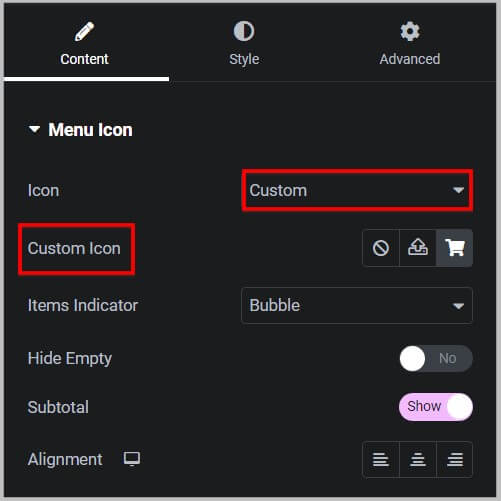
Moving on from the Loop feature, the next improvement that has been introduced in Elementor Pro 3.12 is for the Menu Cart widget.
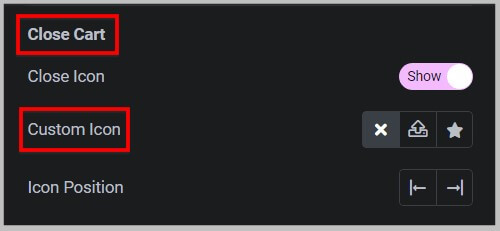
And in this an option to select / add custom icons has been added in various places. See the below screenshot for reference.
Menu Cart icon
- Before Elementor Pro 3.12
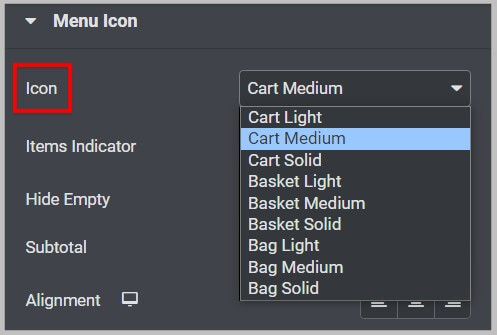
- After Elementor Pro 3.12
Close Cart
- Before Elementor Pro 3.12

- After Elementor Pro 3.12
Other changes in Elementor Pro 3.12 update
- Nav Menu widget has been renamed to WordPress Menu
- Page Transitions feature has been promoted to Stable
This concludes everything you need to know about the Elementor Pro 3.12 update.
If you have liked what you have read want to get Elementor Pro then you can do so by clicking our SPECIAL LINK or the button below.
Elementor Pro 3.12 pricing and Plans
By now you are familiar with Elementor Pro 3.12, the next topic we are going to discuss is its pricing and plans.
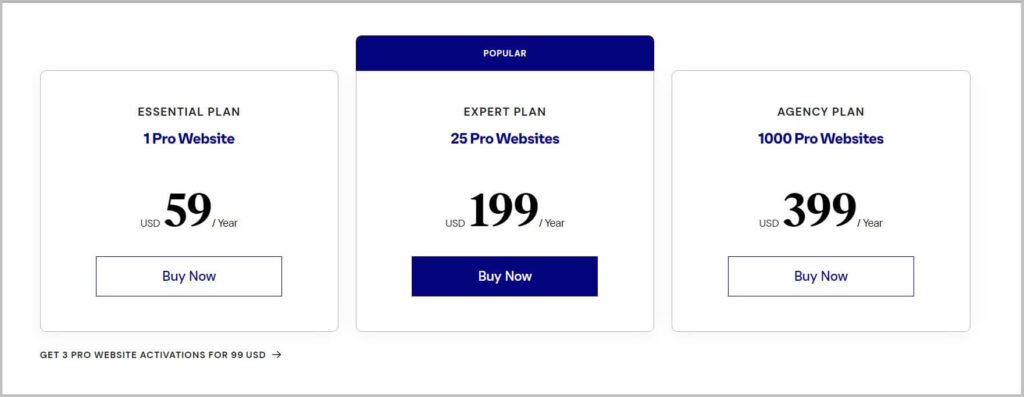
Elementor Pro has 4 plans
- Essential (1 site)- $59
- Advanced (3 sites)- $99
- Expert (25 sites)- $199
- Agency (1000 sites)- $399
What’s included
- 100+ Basic & Pro Widgets
- 300+ Basic & Pro Templates
- Theme Builder
- WooCommerce Store Builder
- Landing Page Builder
- Pop up Builder
- Form Builder
- Marketing Tools
- Premium Support
And more
Before we move forward, it is important to know that if you are looking for a reliable host for your Elementor site then Elementor Cloud Website is for you.
Elementor Cloud Website is an all-in-one platform using which you can create your site from scratch using Elementor.
It has 4 plans and using our SPECIAL LINK you will get discount on Elementor Cloud.
- Basic (1 site)- $9.99
- Business (1 site)- $19.99
- Grow (3 sites)- $22.99
- Scale (10 sites)- $49.99
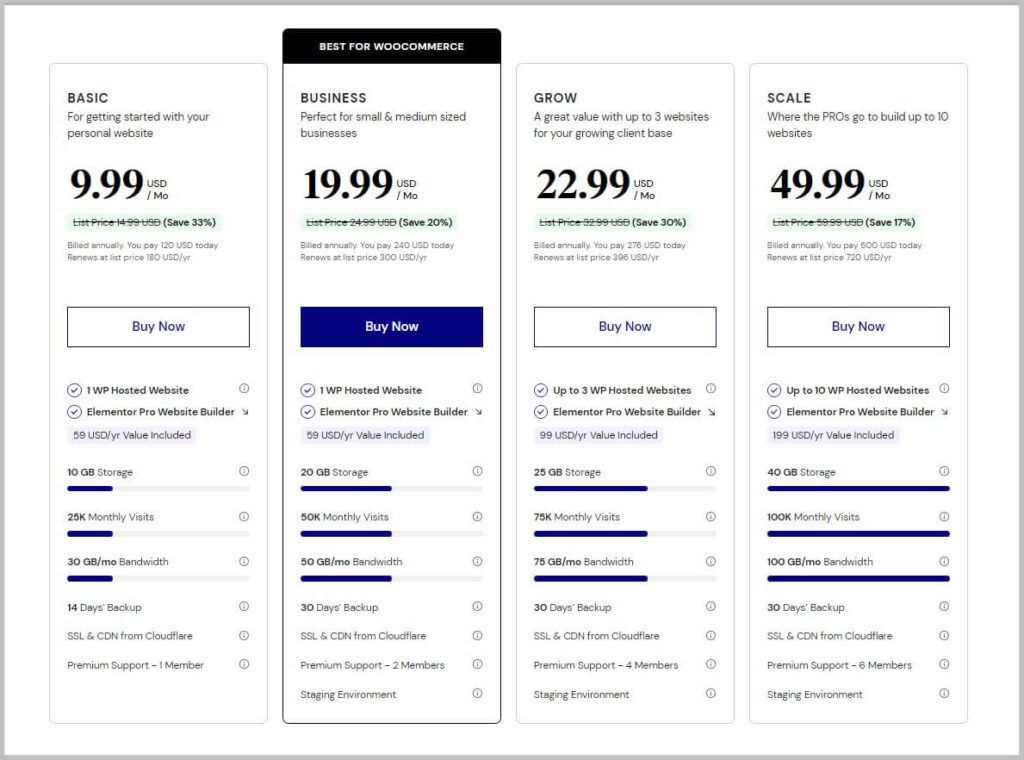
What’s included
- Hosting powered by Google Cloud Platform
- Free SSL
- CDN from Cloudflare
- Free custom domain connection
- 100+ pre-designed websites
- Hello theme and WP pre-installed
- Automatic Backups
- Drag-and-drop, no code editor
- Staging Environment
- Premium support
And more
Get Started With Elementor Pro 3.12
Now that you are familiar with the Elementor Pro pricing, the next step is to get started with Elementor Pro 3.12.
For that you will have to buy Elementor Pro plugin and the first step is to visit Elementor and click Page Builder Plugin under Pricing on the homepage.
Doing this will show you all the plans and here you will have to pick one as per your needs.

On selecting a Elementor Pro plan, it will take you to the checkout page where you will have to create an account on Elementor.
Once done, the next step is to provide information for billing and complete the purchase.
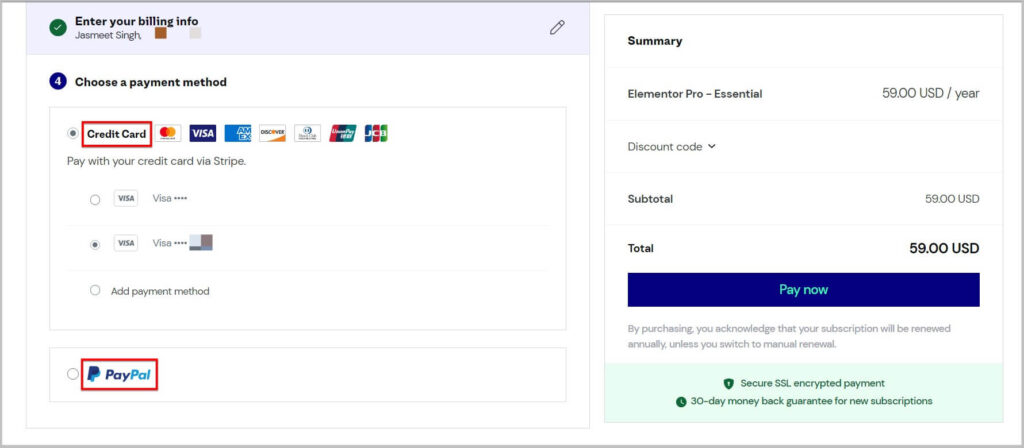
And that’s it you have successfully bought Elementor Pro plugin and the next step is to
- Download Elementor Pro plugin
- Install Elementor Pro on WordPress
- Activate Elementor Pro license key.
Elementor Pro 3.12
Having said that,
I hope you will find this article helpful and are now familiar with what’s new in Elementor Pro 3.12.
In case you have any queries feel free to get in touch.
To stay up to date with our content we recommend you subscribe to our YouTube channel and email list.
Also, don’t forget to join our Facebook group.

