Disclosure- Hello there! Before you get started just wanted to be transparent and let you know that Blogging Unplugged is a blog that makes most of its income from affiliate commissions meaning some of the links on this page are affiliate links and if you purchase a product using our link we will make a small commission. Also, the product purchased will not cost you anything extra and in some cases you might get a decent discount using our links. Thank You for listening and Have a good day.
How to Set up SiteGround email on Gmail- Easy to follow Tutorial
If you are here then I’m sure you are looking to set up SiteGround email on Gmail and we have discussed the complete process in this tutorial.
First things first, in our pervious tutorial we discussed how can you configure Siteground email on Outlook.
And if you have landed on this page and want to do it on Outloook then follow the tutorial linked above.
Now coming to the point,
Gmail is a popular free mail service by Google and mostly likely you will have an account on it.
In case you don’t have one then I will recommend create one and it will take only a few minutes.
It is important to know that this service is often confused with GSuite which is a premium yet pocket friendly mailing / office application service by Google that allows you to create and host domain based emails and more.
Keeping this in mind, for this tutorial we will be using Gmail (free service) and not GSuite (premium service) for setting up your SiteGround email.
Also, we have covered configurations for both incoming and outgoing emails and this means you will be able to send and receive emails on your Gmail account.
How to set up your free SiteGround email on Gmail
In case you haven’t yet created an email account on Siteground then we will recommend doing it now and for that you can follow our tutorial on How to create an email account on SiteGround.
Below are the topics we have covered in this tutorial and you can jump to the section of your choice by clicking on the links
Lets dive into the tutorial and set up SiteGround email on Gmail
Login to SiteGround
To set up SiteGround email on Gmail, the first step is to login to your SiteGround dashboard and for this you will have to visit siteground.com and then click Login.
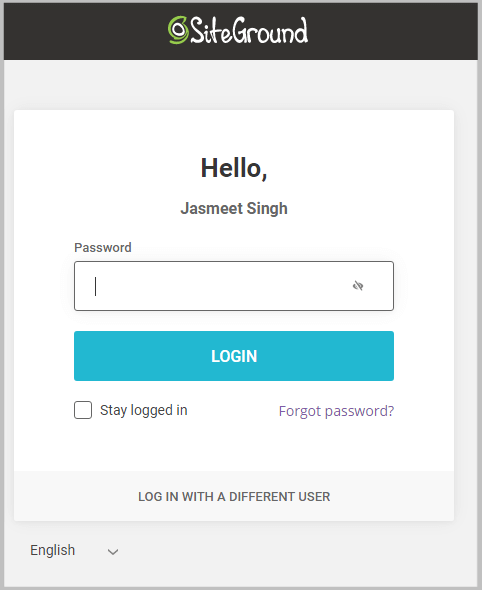
When you click Login, it will take you to the SiteGround’s login page where you are required to enter valid your username and password.
Go to SiteGround Site Tools
After a successful login, you are required to click Websites in the navigation

And doing this will show you all the sites you have hosted on your SiteGround plan.
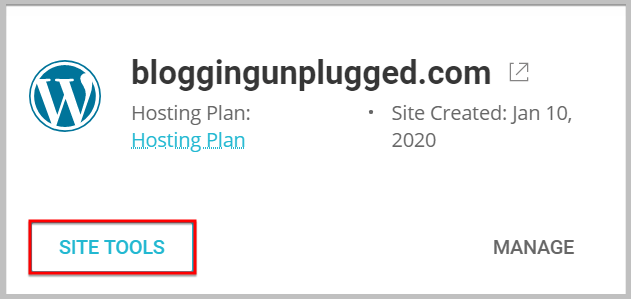
Here you will have to click Site Tools under the domain for which you want to set up email on Gmail.
Headover to SiteGround email account manager
Once you are inside the control panel of your site or Site Tools, the next step is to navigate to Emails in the sidebar and click Accounts.

Doing this will take you to the SiteGround’s Email Account Manager and you will see all the email accounts listed.

Open the Mail Configuration option
In the next step you will have to click the Kebab menu under Actions and it will show you the Mail Configuration option.

When you click Mail Configuration a popup will appear with 2 options
- AutoConfigure
- Manual
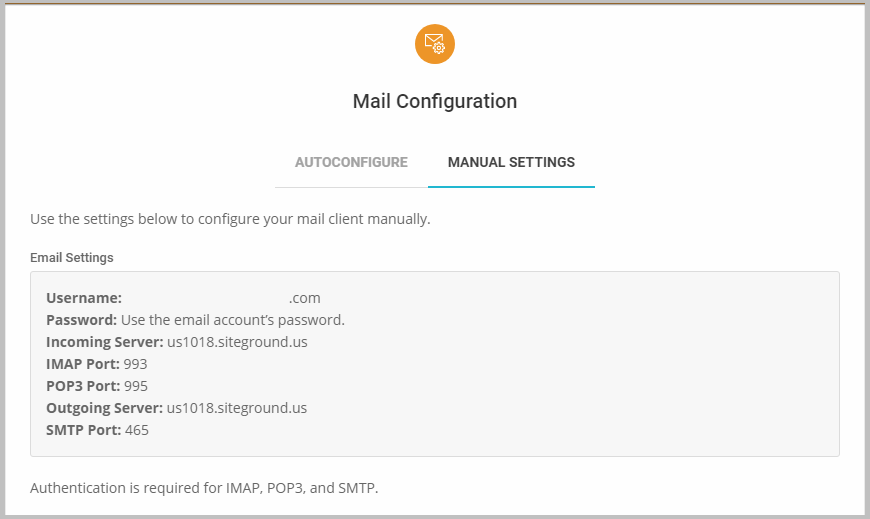
Here you will have to select Manual and it will show you all the values you need.
Now you will have to keep this popup opened until you have a fully set up SiteGround email on Gmail as you will be needing this values.
Set up SiteGround email on Gmail
To set up your SiteGround email on Gmail, the first thing you have to do is login to your Gmail Account and click gear icon on top.

When you click on this icon a menu will appear where you need to select See All Settings

Doing this will show you all the Gmail Settings and in the next step you need to Navigate to “Accounts and Import” and then locate check mail from other accounts.

Here you need to click Add a mail account and a popup will appear where you need to add the free email address that you have created in SiteGround and then click Next.

In the next step it will show you 2 options to import emails and you need to select “Import emails from my other account (POP3)” and click Next.

On clicking Next, it will show you some settings and below I have described each one of them briefly.
- Username- Here you will have to select a username for this account. We will suggest using the email address here as it will be easy to remember.
- Password- In this option you will have to enter the password of the email account that you have created in SiteGround.
- POP Server- You will find the POP server settings in the Mail Configuration in SiteGround. The port number in 995.
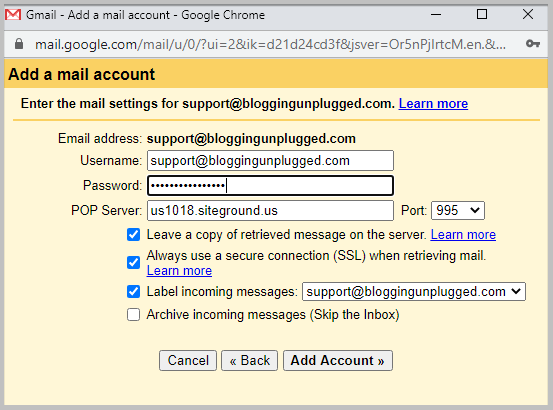
After this you need to select 3 more options which are
- Leave a copy of retrieved message on the server
- Always use a secure connection (SSL) when retrieving mail.
- Label incoming messages
And the last thing you have to do is click Add Account
On clicking this, it will show you a success message and also will ask if you want to send email using this.

If you want to then select Yes and click Next.
When you click Next, it will ask you to enter the name and after adding click Next.

Please not that we do currently do not provide support service and this email is not working. However, we do provide Free Blog Set up Service.
Doing this will show you the SMTP server settings and you will find all these values inside Mail Configuration in SiteGround.

Keep in mind, the username needs to be your email address and enter the same password that you have selected in SiteGround.
Once done, click Add Account and it will send a confirmation code to the email address.
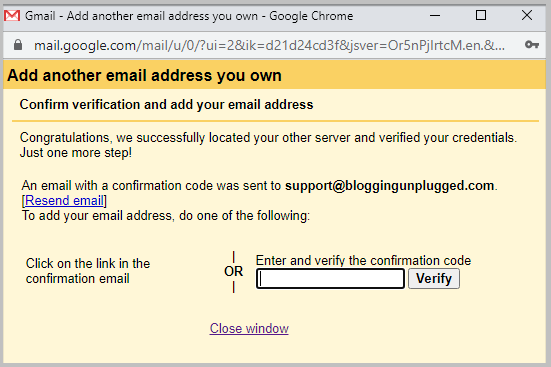
You need to enter the code in the space provided and click Verify.
And that’s it you have successfully verified your free SiteGround email account in Gmail.
After completing this process , we did receive and email and below is the screenshot.

And then we sent an email from this email account using Gmail and was successful in doing so.

In case you are wondering how to send emails using this account then let me tell you here you will have to click Compose first.

And in the From section you can see a drop down using which you can select the preferred email address.
The last step is to add a subject and the message and then send it.
That’s it you have now successfully set up Siteground email on Gmail.
Other SiteGround articles
- How to buy hosting from Siteground
- How to install WordPress on SiteGround
- How to activate free SSL on SiteGround
- How to activate SuperCacher in SiteGround
- What exactly is SiteGround
- SiteGround Black Friday Sale
- SiteGround Summer Discount
- SiteGround Cyber Monday Deals
- Is SiteGround the best web hosting company
Having said that,
I hope you will find this tutorial helpful and are easily able to configure SiteGround email on Gmail.
In case you have any queries feel free to reach out and we will be happy to help.
To stay up to date with our content we suggest bookmarking our Beginner’s guide section, following this blog and joining our ever growing Facebook community.
