Elementor 3.0 Update- New Theme Builder, Design System, Page Speed
The wait is finally over, Elementor has released its version 3.0 on August 25th and this is the first major update the plugin has received in around 2 years.
In Elementor 3.0, the emphasis has been given to improving the already existing features and creating a design system which will
- Simplify the process for beginners
- Speed up the site creation
- Improve performance
It is important to know, in this update both Elementor Pro and free have received significant improvements and we will be covering all the changes in this article.
Having said that, let’s dive into the article.
Changes to branding in Elementor 3.0
One of the very first changes you will notice when you click the “Edit with Elementor” button is the change of font for the brand name “Elementor”.
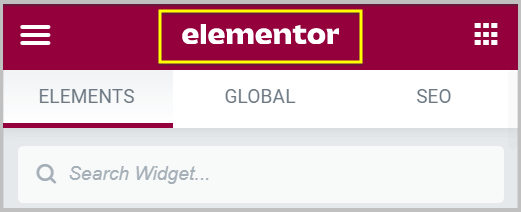
As you can see in the screenshot above, the font used is very bold as compared to the one before. Also it is much more prominent and can’t be missed. On top of that the background has been changed as well and that makes it stand out more.
Organized Elementor configuration menu
First things first, you can access the Elementor’s configuration menu by clicking the hamburger icon on top left.
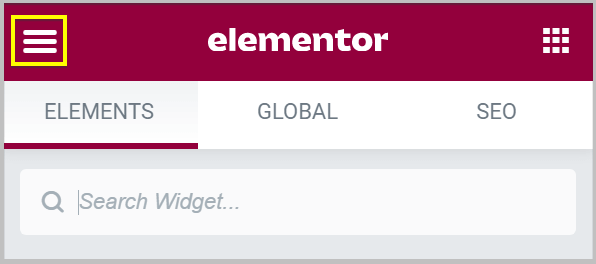
If you have been using Elementor for a while then there are chances that you may have come across these settings before and in all honesty, when I started using Elementor, I found this part of the plugin quite overwhelming. And I’m sure some of you will be able to relate to this.
Now, this was due to the fact that there were too many settings and much less organization.
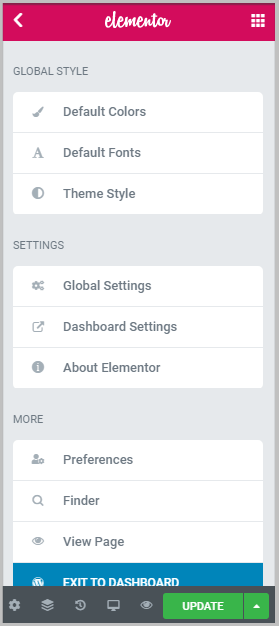
In Elementor 3.0, this section has received a massive update and before we discuss the changes, below are the before and after screenshots.
Before Elementor 3.0
After Elementor 3.0
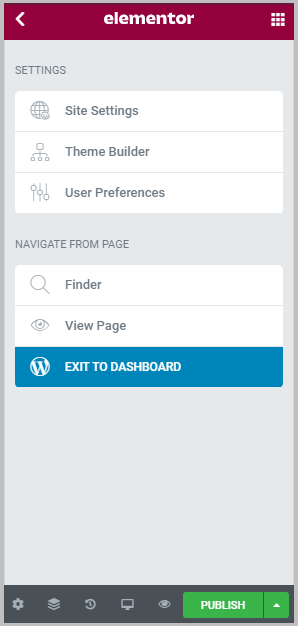
When you compare both of the screenshots above, the first thing you will notice is that, there are much less settings in this menu after the update. And the ones you can see are clearly defined.
Also you can see there are 2 new settings
- Site Settings
- Theme builder
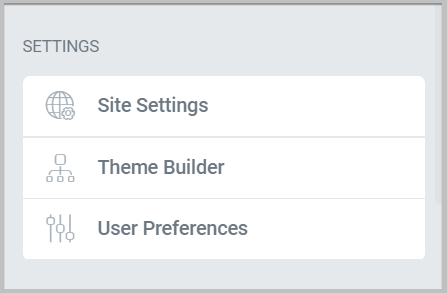
The theme builder option in the settings menu will take you to the revamped theme builder. (More on this later in this article)
And as the name suggests, Site Settings contains all the global settings impacting your site ranging from fonts to colors to layout and more. Below is the screenshot of the all new Site Settings in Elementor 3.0
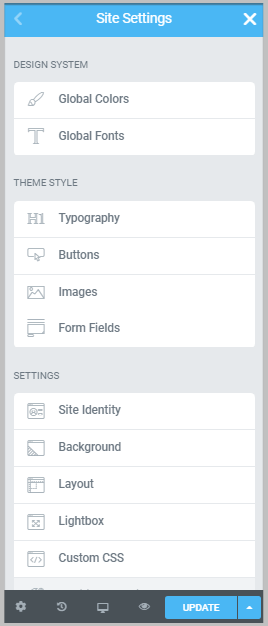
The site settings menu is divided into 3 parts
- Design System
- Theme Style
- Settings
And below we have discussed updates to the site settings section of Elementor.
Introduction of Design System in Elementor
With the release of Elementor 3.0, a new design system feature has been introduced. If you are not familiar with the design system then let me tell you briefly about it.
We all are familiar with Amazon and have used it to buy products at some point of time. Now if you see Amazon’s website carefully, you will notice the color schemes, typography, layout and other design elements are consistent across the website and all regions.
And this is because Amazon has a design system in place using which it can deliver consistent design experiences to its visitors.
Now, this takes me to the exact definition of a design system which is – A design system is a collection of your brands visual guidelines and it includes colors, patterns, typography, reusable graphics and other elements that help maintain brand consistency.
Design System has been a part of the website design industry for a very long time and it was a much needed feature in Elementor.
In Elementor 3.0, under Design system you will find 2 settings
- Global Colors
- Global Fonts
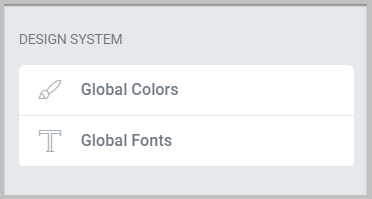
Using these you can set Global Colors and Fonts of your website respectively. Design System in Elementor is not just limited to these 2 settings and other features to set Global Design elements can be found under the Settings section.
Having said that,
The first setting in the Elementor 3.0 design system is
Global Colors
As mentioned above, using this setting you can create a Global color palette for your website.
To add colors, you need to click Global Colors in Design system and it will show you the default list of colors.
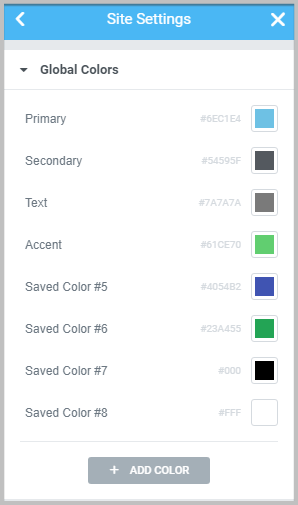
Here you can either click Add Color button in the bottom to add a new one or click an existing color on the list and select the one you want using the color picker. See the below screenshot for reference.
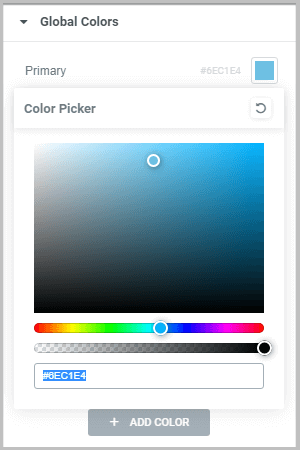
Also, you can change the name of the color by just clicking on it. Once you are done making the changes click Update to save the changes you have made.
After adding Global Colors, let’s see
How can you use Global Colors in Elementor
For demo purposes, I have created a Pricing Table using Elementor Pro and first I will be adding colors to various elements using this feature and after that, I will be changing colors.
The elements that I will be editing are
- Header
- Button
- Ribbon
- Price
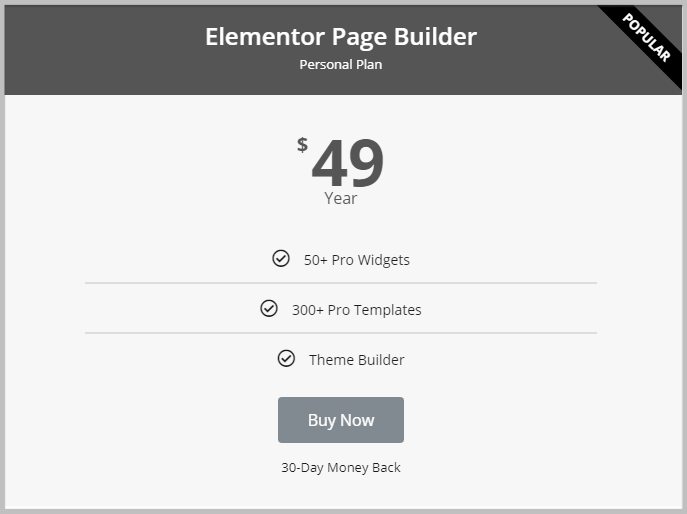
And below is the screenshot of the pricing table before using Global Colors.
To change the color of the above-mentioned elements, you need to click Style and then locate Background color under Header.
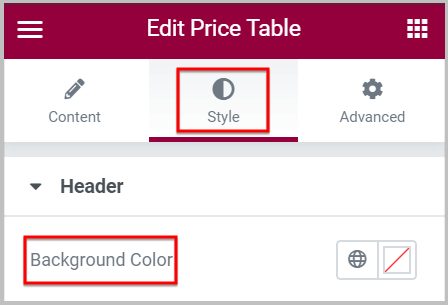
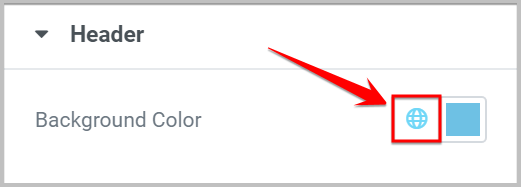
In the next step, you need to click the Globe icon in front background color and select a color from the list of Global colors you have created. Here I will be selecting Primary.
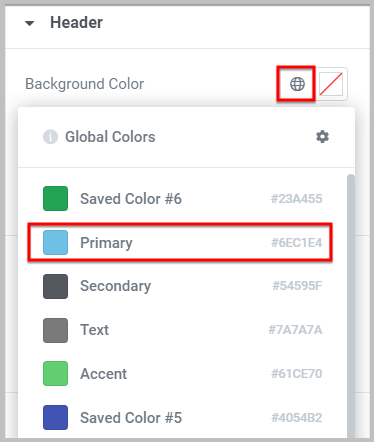
Similarly, I went ahead and made changes to the other parts of the pricing table and I have selected
- Primary for header and button background color
- Save Color #6 for Pricing and Ribbon background color
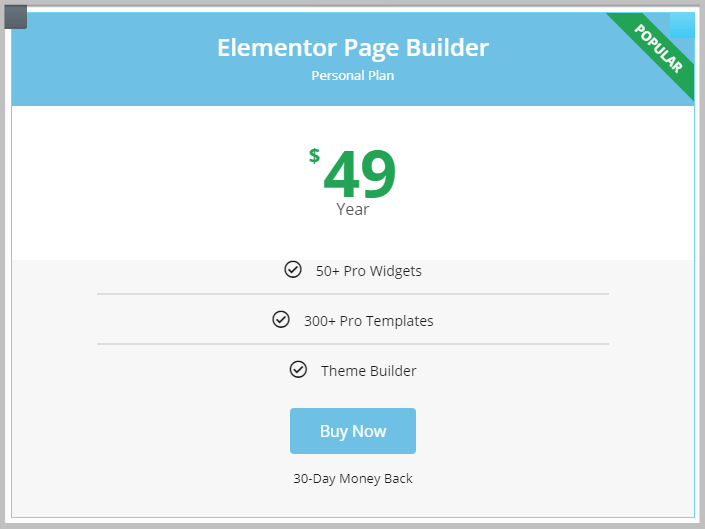
And here is a screenshot of the pricing table after adding Global colors.
Befor we move forward, it is important to note that the color of the Globe icon turns Blue, on using a Global color.
Now, the next question is what if you want to change the colors of these elements again. Do you have to make these changes to each one of them.
The answer is No and to change colors all you have to do is visit Global Colors and change the color you have applied on these elements and it will automatically change the color of every part of your site using this Global color.
For example, if I change Primary to a shade of Red and Save Color #6 to Blue, the color on the elements using these Global colors on pricing table will change automatically.
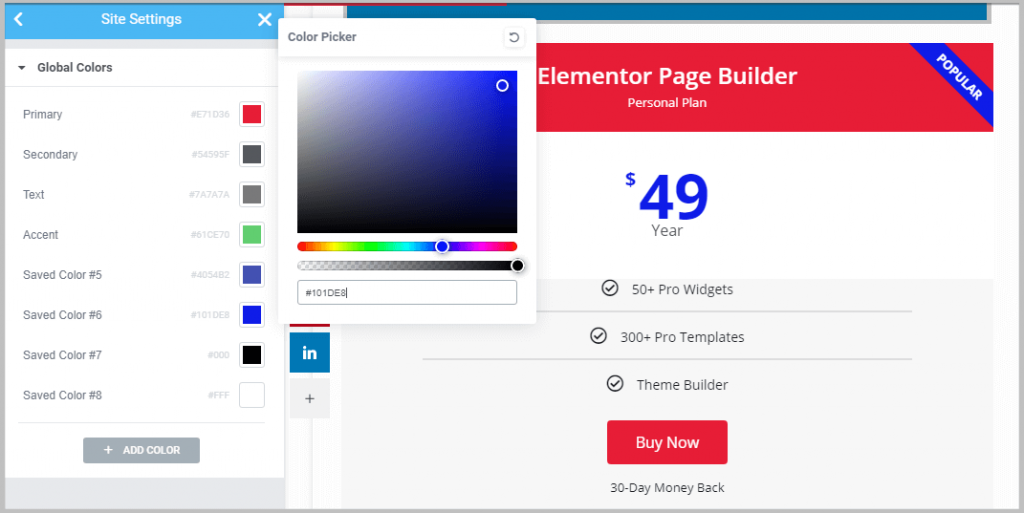
Keep in mind if any other parts of the website were using these Global Colors then it will also change automatically. What this means is Global colors is not just limited to a page or a widget, it has a site-wide impact.
Now, if you are re-designing or re-branding your site then using Global Colors will save you a lot of time as you will not have to add or update colors of elements individually. Also, it will help maintain a brand consistency across your site.
And the best part is you can do this with just a few clicks and no coding required.
Having said that,
If you are wondering how can you add a pricing table then let me tell you it is a widget available on Elementor Pro and with a single click you can add it pages or posts.
Global Fonts
The second setting under the Design System in Elementor is Global Fonts and just like Global Colors, here you can select different font types, sizes, weight, and more that will impact your site globally if used.
Global Fonts work exactly the same ways as colors. Once you make a list of styles, use them on your site and later on in case you want to change or update the fonts then all you have to do is update it in Global Fonts and the changes will be reflected across the website automatically.
Having said that,
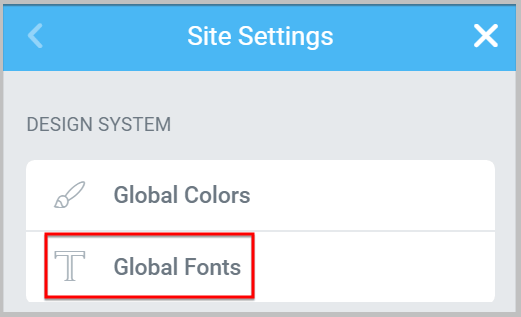
To add Global Fonts, the first step is to click Global Fonts under Design System
And it will show you a list of predefined styles and if you want to add a new one then you can click Add Style to add a new one to the list.
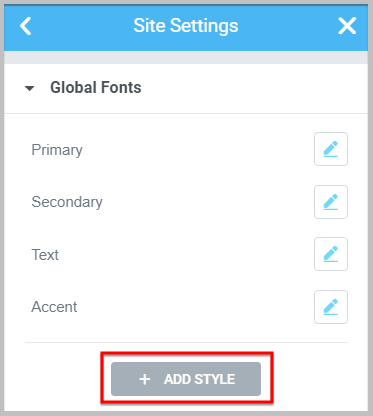
In case you want to edit an existing style then you can click the Edit icon infront of the style and make the required changes.
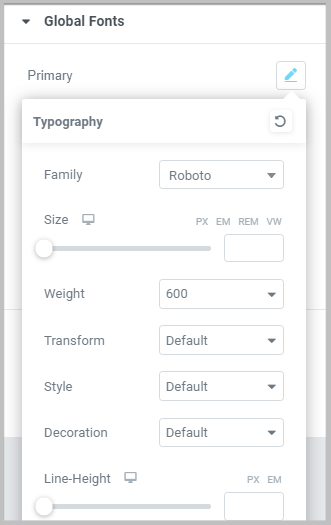
Also, you can change the name of the style just by clicking on them. Now, let’s see
How Global Fonts work in Elementor
For this I will be again using the pricing table that I have created before and will be adding Global Fonts to
- Title
- Features
- Button
- Ribbon
To implement Global Fonts on these elements you need to first select or add the widget and then select Style.
On selecting Style, you will find Title under Header
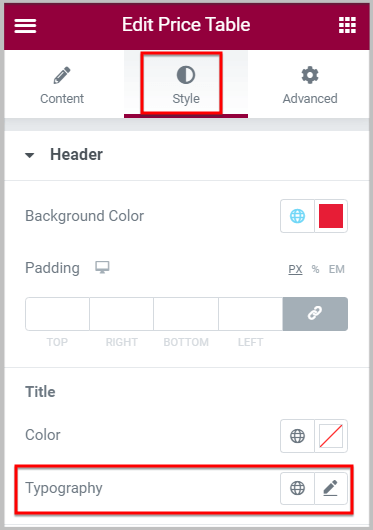
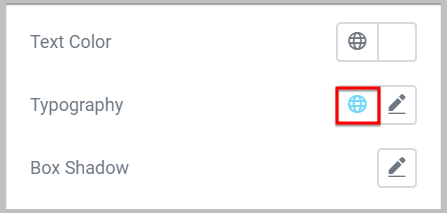
Now, you need to locate typography and click Globe icon and it will show you all the Global Font styles you have created. You need to select one from the list.
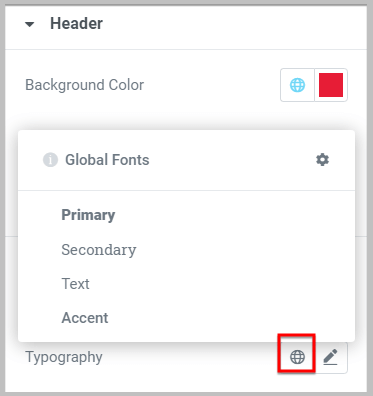
Here I will be selecting Primary again and below is screenshot of pricing table after adding Global Fonts.
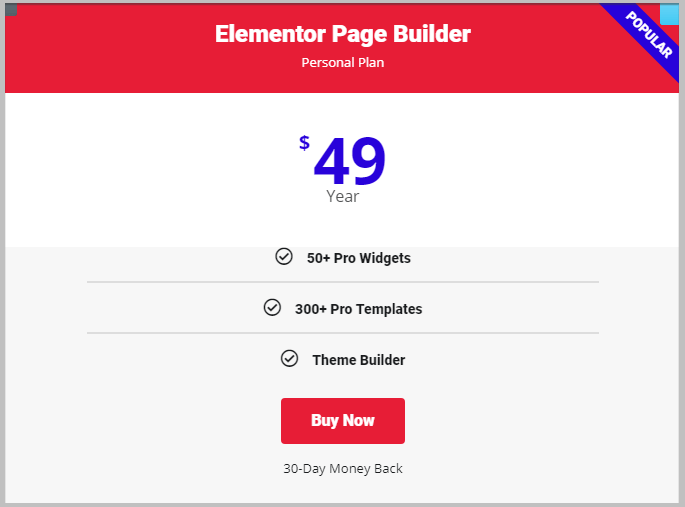
On doing this, the color of the Globe icon will turn Blue indicating the use of Global Fonts feature.
Now, let’s just go back to the Global Fonts in Elementor site settings and see if changing fonts will have any impact.
As I have used Primary on all elements, I will update the style by clicking the Edit icon and with change font family to Red Hat Display and weight to 600.
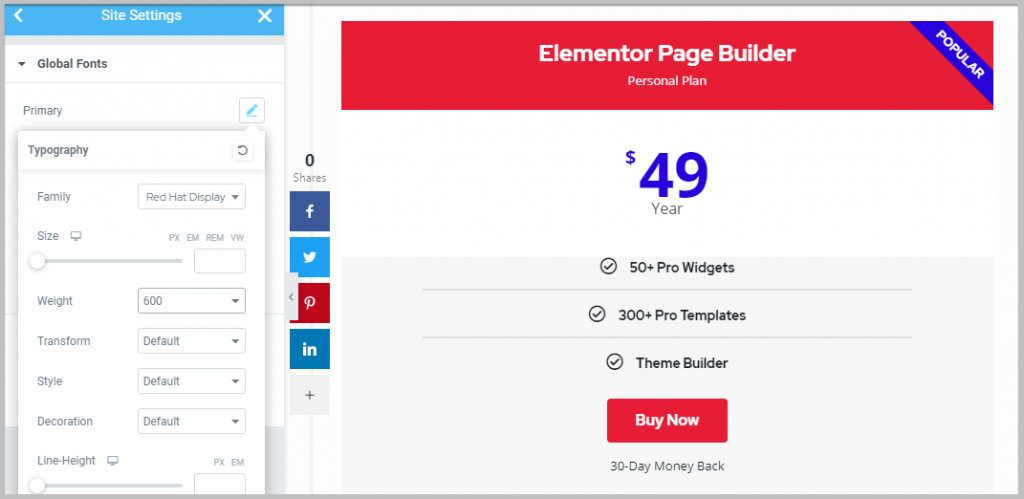
You will see, as soon as you make the change, the style will update automatically. And the best part is it saves a lot of time and is super easy to execute with no coding knowledge required.
Having said that,
Another very interesting addition to Elementor after the release of version 3.0 is the
Addition of Site Identity
Site Identity is one feature that you would have definitely come across during the WordPress set up phase of your website.
When it comes to your online presence, branding matters. And Site Identity takes care of that by allowing you to add the branding elements to your site such as logo, title, description and more.
Before the release of Elementor 3.0, Site Identity settings were only found under Customization under Appearance in WordPress. However, if you are using Elementor, you will be able to access it inside Elementor editor as well.
This means if you are creating a website using Elementor and you want to add a logo to your site or a description to your website or blog then you will not have to leave the Elementor editor like before.
Having said that,
Inside Site Identity in Elementor, you will get the same basic settings that you have in WordPress and if you want to configure it then the first step is to click the hamburger icon on the top left and then select Site settings.
On clicking site settings, you will find Site Identity under settings.
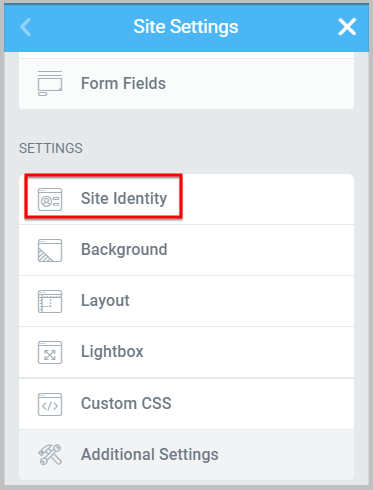
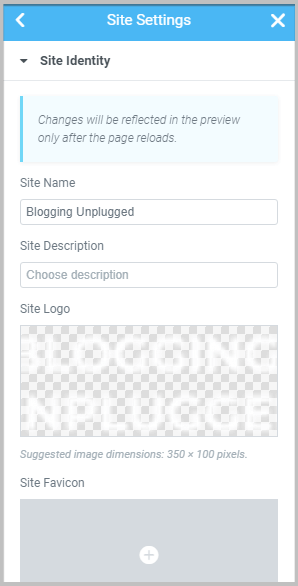
The next step is to click Site Identity and it will show you all the settings
- Site Name
- Site Description
- Site Logo
- Site Favicon
Add Site Name in Elementor
To add Site Name, you will have to enter the name of the website in the box below Site Name.

Once you are done adding the name, the next option let’s you add a small description about your website.
Add Site Description using Elementor
You can add the website’s description in Elementor in the box just below Site Description.

After adding site description, you will find the option to
Add Site Logo
Using this option you can add a logo to your website.
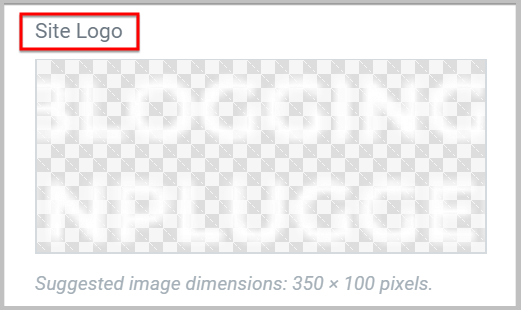
To add a logo using Elementor, you need to hover your mouse pointer over the box below Site Logo and Choose Image button will appear
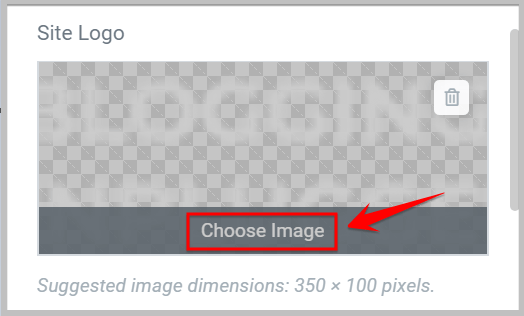
On clicking, it will take you to Media Library from where either you can select an existing image or upload a new logo.
The last option on the list is
Site Favicon
This option lets you add a favicon to WordPress site using Elementor.
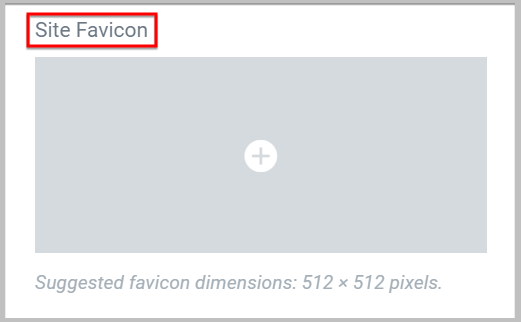
For adding a favicon, all you have to do is click on the box below Site Favicon with (+) sign.
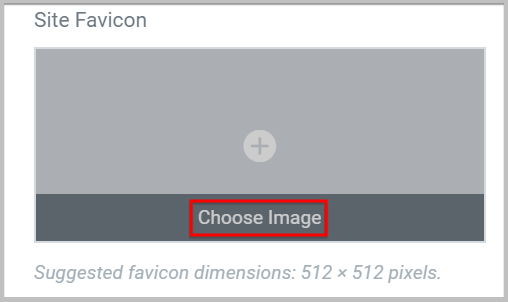
And it will take you to the Media Library just like before where you can either select an already existing image or upload a new one.
Having said that,
In case you are looking for tools to create graphics for your website then I will highly recommend using Canva. It is an online graphic design tool using which you can create logos, banners, Pinterest images, or anything else easily and the best part is, it is free to use.
Once you are done adding everything click Update to save the changes you have made.
Moving forward,
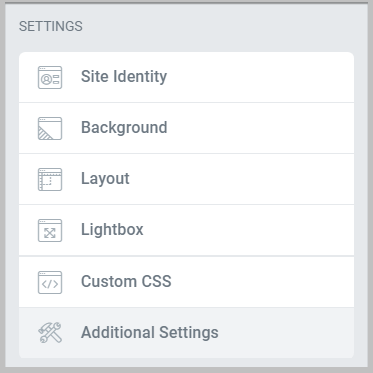
It is important to know in Elementor 3.0 some of the settings from the main configuration menu have been moved under the Site Settings and these are.
- Theme Style
- Dashboard Settings
- Global Settings
Also, the Dashboard settings have been renamed as Additional settings in Elementor 3.0 and it can be found inside Site settings under Settings.
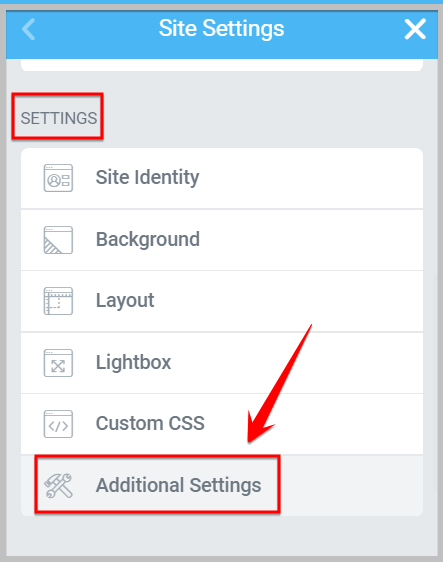
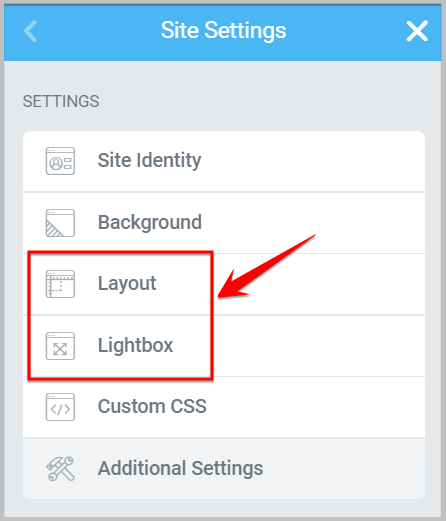
Unlike dashboard settings that have been renamed and relocated, the options under Global Settings have been moved to Site Settings under Settings and these are
- Layout earlier known as Style
- Lightbox
While we are discussing Layout settings, it is important to know, now using this setting you will be able to Select Default page layout for your entire website.
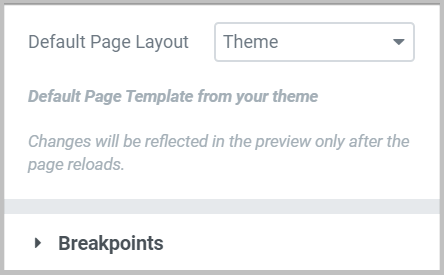
Also, it will let you define breakpoints for mobile and tablet. All in all, in this update, Elementor has put the spotlight on organization and efficiency.
Having said that, next we are going to discuss
Changes to Theme Builder in Elementor 3.0
If you are an Elementor Pro user then you already know, it has a theme builder feature using which you can create your blog or website from scratch without having to worry about code.
And in this update, the theme builder has been completely revamped with a new user interface and features.
Before we dive into the major updates, it is important to know after the Elementor 3.0 update you can access theme builder in 3 ways.
WordPress Dashboard
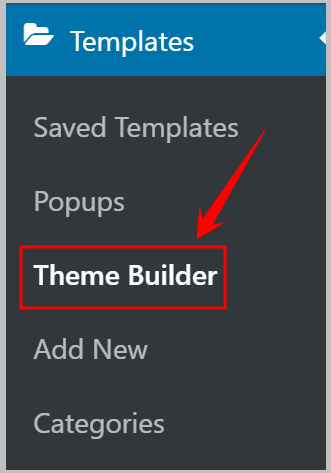
To access Elementor’s theme builder from your WordPress admin, you need to locate the Templates tab in the admin panel and then select Theme Builder.
Elementor Editor
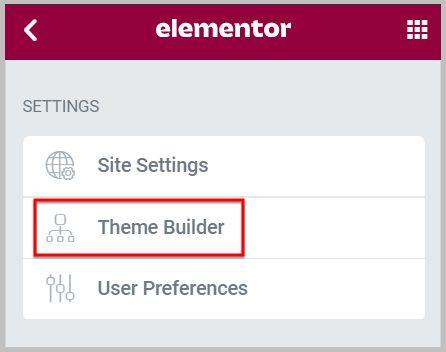
If you are in the Elementor editor and want to visit the Theme builder then you will have to click the Hamburger icon on top left.

And it will take you the Configuration menu where you will find the option to visit the Theme builder.
Using Keyboard Shortcut
The last method is the quickest one to access the theme builder and it is by using keyboard shortcuts.
If you are a Windows user then Press CTRL+SHIFT+E and Mac user will have to Press CMD+SHIFT+E and doing this will directly take you to the theme builder.
Now that you know how to access the Elementor theme builder, the next topic we are going to discuss is
Changes to User Interface in version 3.0
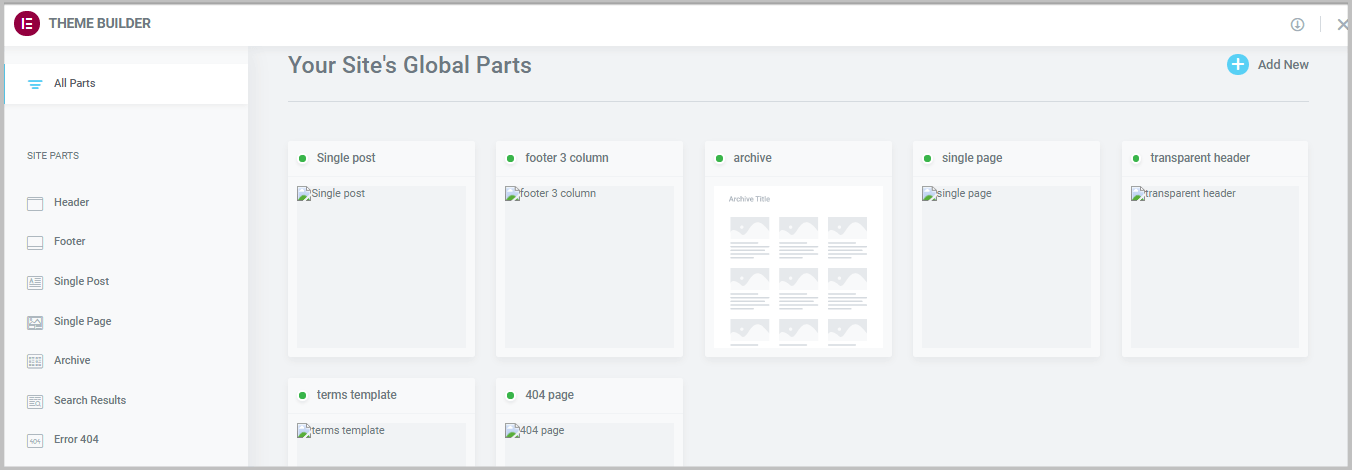
First things first, the new Elementor theme builder is a React based application that will show you the birds eye view of various components of your website such as
- Header
- Footer
- Pages
- Posts
- Archives
And more.
Before this update, all of the templates you have created were displayed in a list table
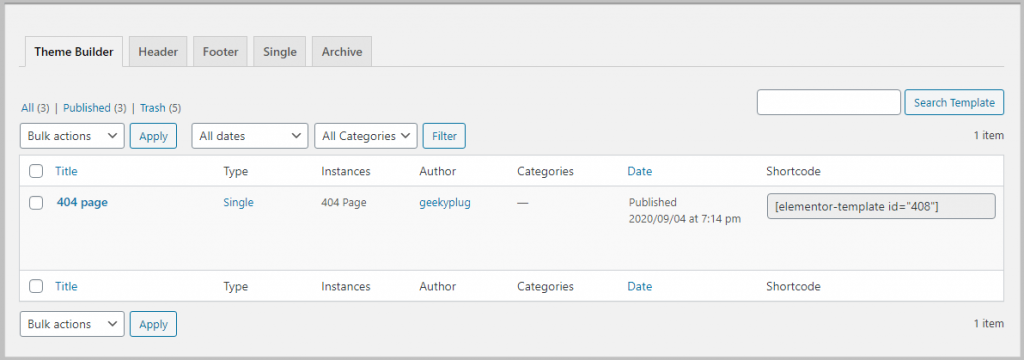
And if you compare both of the images above, you will see that the new theme builder is much more visual, organized and beginner friendly.
By beginner friendly I mean, the new Elementor theme builder makes it easy for the new webmasters to know which templates they have to create for the website and which ones are missing.
For example, in the above image you can see I currently do not have a template for Search Results and that is why it is missing from the Global Parts.
While we are on the topic of missing templates, it is important that we discuss the
Changes to adding new templates in Elementor Theme Builder
Before Elementor 3.0 update, to add a new template you had to visit the theme builder and click Add new and then a popup with a drop down would appear. See the screenshot below for reference.
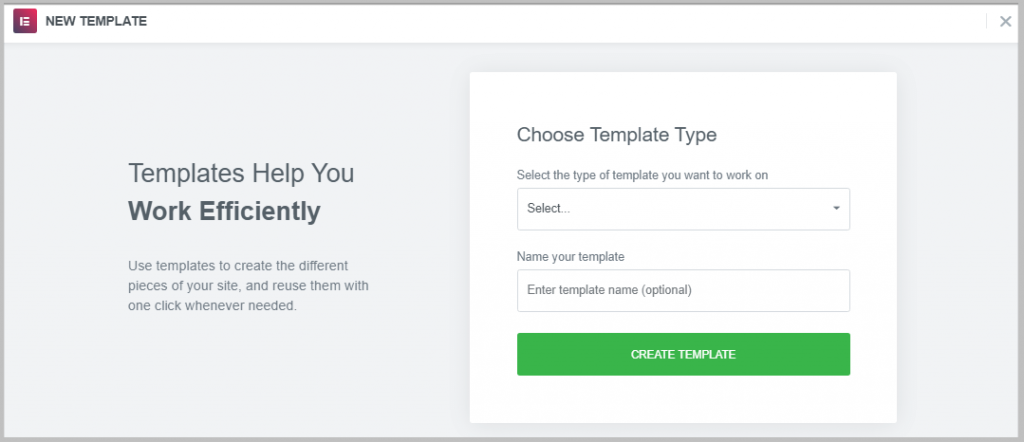
Here you had to select the template type from the drop down, enter the name of the template and then Press Create Template.
On doing so, it will take you to the Elementor editor where you can easily create a template. And after you are done creating, it will be automatically listed under one of the tabs.

Now, after the release of Elementor 3.0, this process has changed completely and if you want to add a new template then you need to navigate to the new Elementor theme builder.
Once you are there, you need to click the Add New button on top right.

When you click Add New, it will show you every part of the website that you can create using Elementor Theme Builder and all you have to do is select the part that you want to create.
For example, as Blogging Unplugged is missing the search results page, I will select Search Results from the site parts and it will take you to the editor where I can create it.
Before we move forward, it is important to note when you click Add New, a new information icon (i) can be seen on every part.
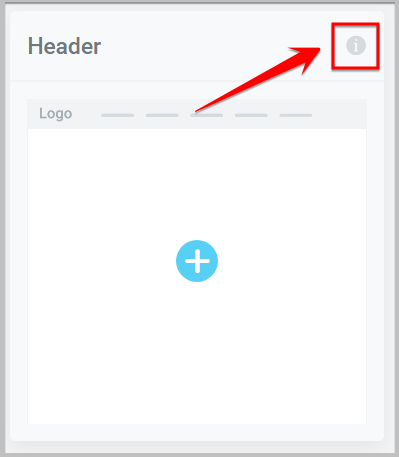
When you click on it, it will show you a video tutorial on how to create that specific part. And this makes Elementor Pro more user friendly.
Having said that,
There is an alternate way of creating a site part and that is by first selecting a part from the sidebar.
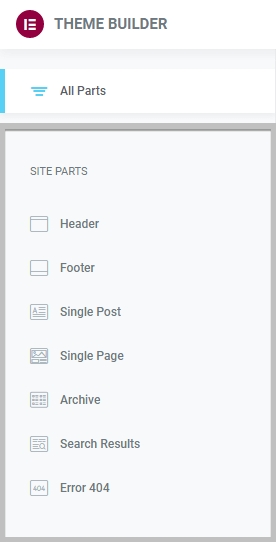
And it will show you all the templates you have create for that site section. Now, to add a new one all you have to do is click Add New button on top.
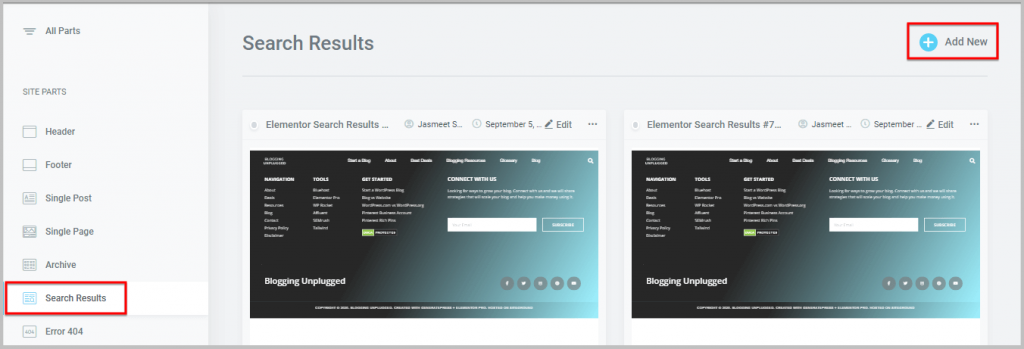
And it will take you the Elementor editor where you can create the template.
Having said that,
Once you are done creating the templates, the next step is to manage them.
Managing Site parts in new Elementor Theme builder
As mentioned above, in the previous version of the Elementor theme builder when you create a new site part, it automatically gets listed under one of the primary tabs.
And in case you have created multiple templates then managing them can be a bit confusing.
However, in the new version because of the visualization of each element the task becomes very straight forward.
First things first, if you have created multiple templates for an element then you can access each template just by clicking on the site part in the theme builder’s sidebar. See the below screenshot for reference.
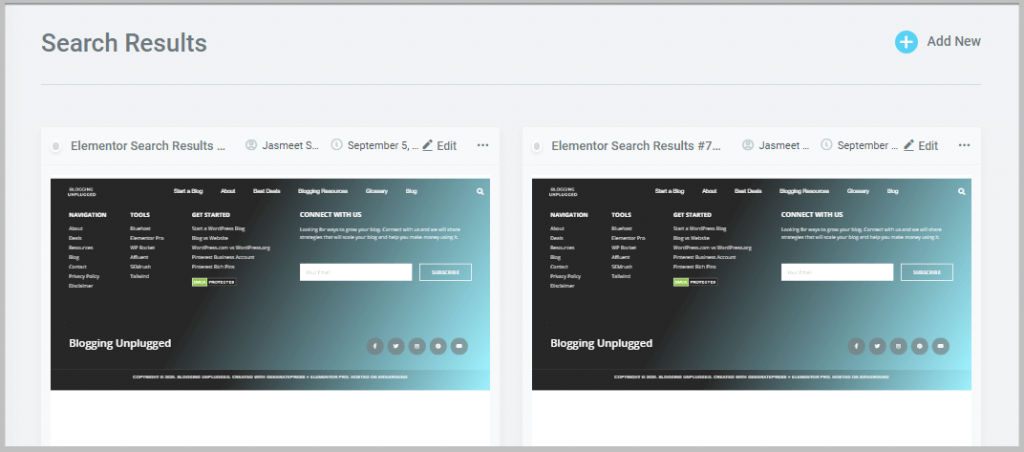
This makes locating a template easy and less time consuming.
Now, if you want to edit a template, you need to just click Edit on the top right of the template and it will take you to the Elementor editor.
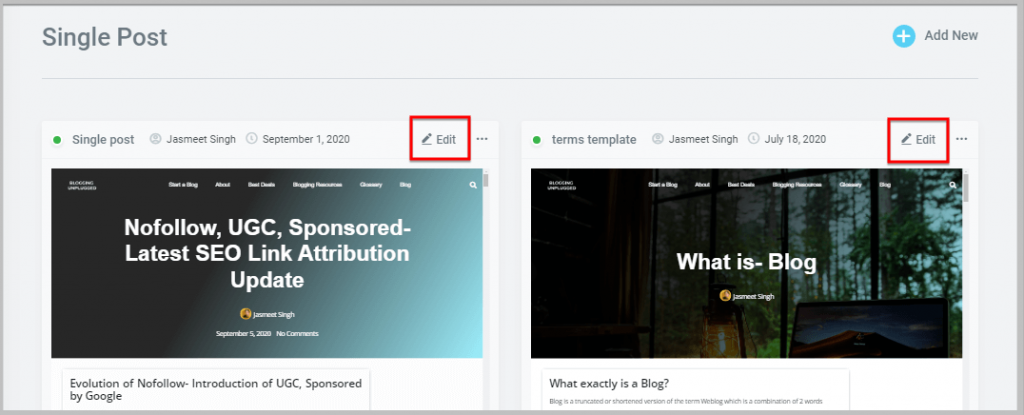
As you can see, I have 2 single post templates one is for the regular posts and the other is for the WordPress Glossary. And both of these templates can be edited by clicking the Edit button highlighted above.
What if you want to delete a template?
For deleting a template, you need to click the 3 dots on the top right
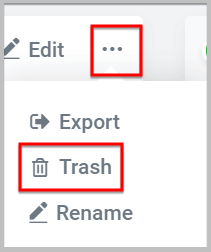
And it will open a small menu just like the screenshot above where you will find the option to delete it.
Also, it is important to note there are 2 other options available.
- Export– When you click Export, it will download a .json file that you can upload in the theme builder of your other website using Elementor Pro.
- Rename– As the name suggests, you will be able to rename the template using this option. On selecting rename, it will show you a popup where you can enter the new name in the box and save the changes by clicking Change.

It is also important to know there is another setting available on the templates and that is Instances or Conditions.
Changes to template Conditions in Elementor 3.0
If you are an Elementor Pro user and have designed your website using the theme builder then I’m pretty sure you are familiar with this setting. However, if you are not then let me tell you briefly about it.
When you create a blog or website using the Elementor theme builder. After creating each part you will have to add conditions stating where this template can be applied.
Before this update, for changing the conditions you will have to edit the template. However, now you can change it by simply clicking the Edit Conditions option below the template.
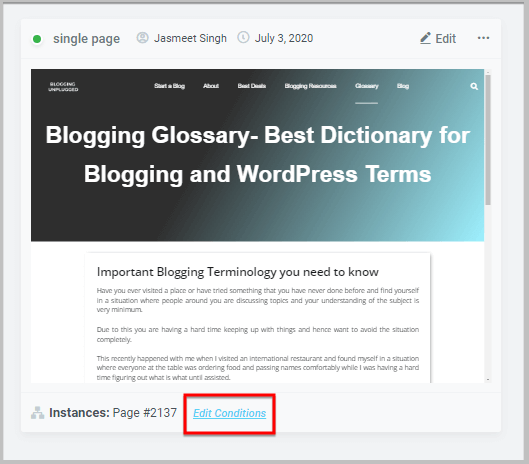
When you click Edit Conditions, it will take you to a page where you will be able to define the areas of your site where you would like to display the template.
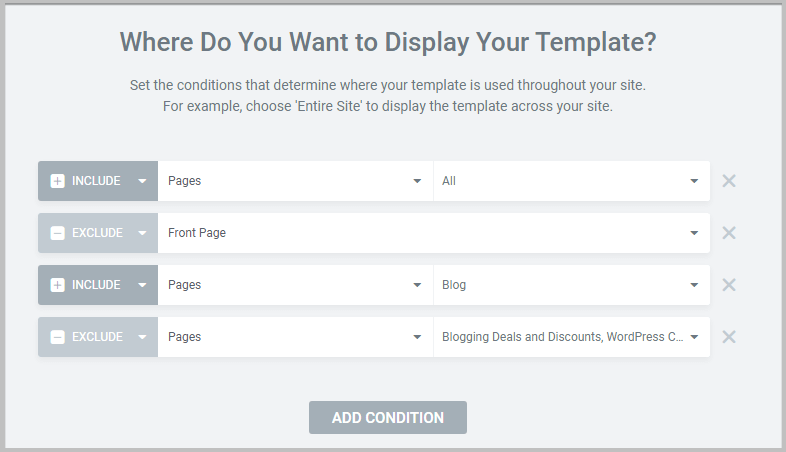
Here all you have to do is click Add Condition then Set the condition and click Save and Close.
This is another change that will save you time and speed up the process.
Now that you know the basics of creating and managing templates in theme builder, it is important to know in version 3.0 Elementor has introduced a new feature using which you can easily know which templates are in use.
For example, in Blogging Unplugged we have created different templates for Single posts and Glossary and there are chances in future we may create more depending on the requirements.
In situations like this where you are managing multiple templates, it used to get a little difficult to know which templates were active in the old Elementor theme builder.
However, in the new version, it is very easy to know which templates are active as these have a Green dot on them.
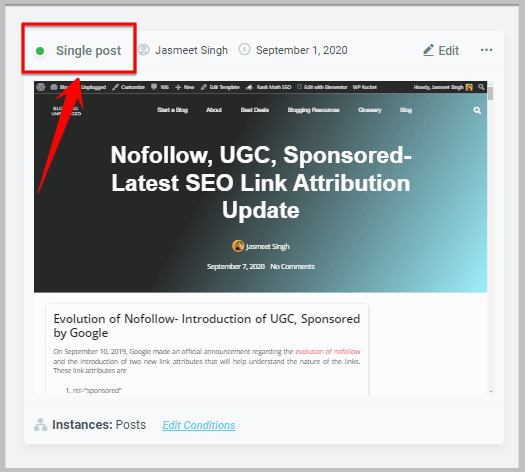
And on the contrary, the inactive ones have a grey dot.
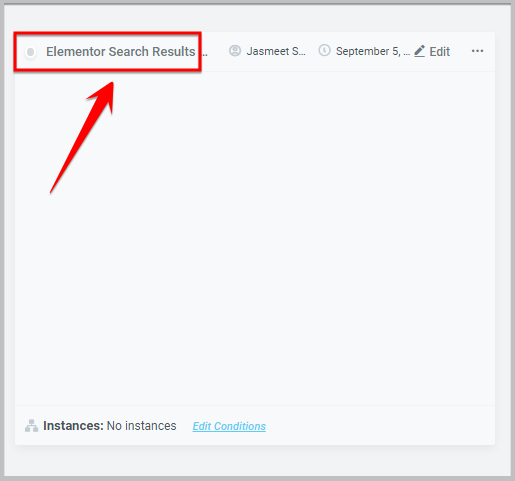
Now, in case you have created a new template and forgot to use it then just by looking at the template you can tell if it is being used or not.
Having said that,
The next update we are going to discuss is
Performance improvements in Elementor 3.0
When it comes to SEO and user experience, page speed plays an important role as it is a ranking factor.
Keeping this in mind, Elementor has done some major changes to the code and infrastructure and it has resulted in significant improvement in performance.
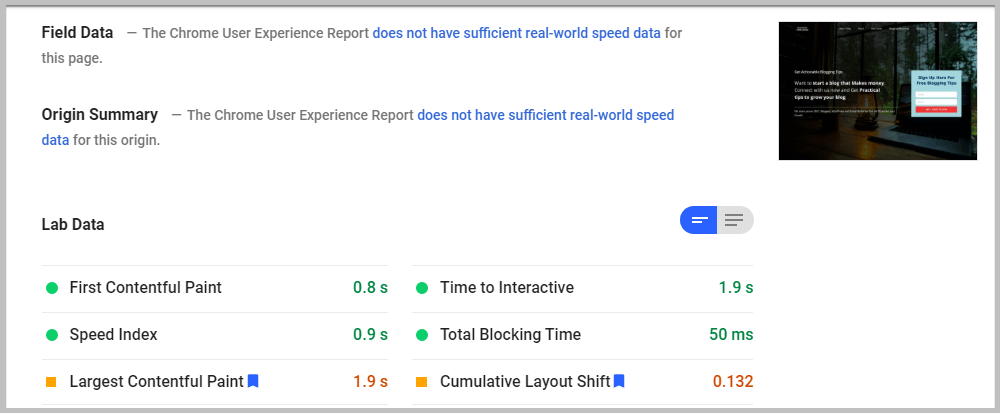
After updating to Elementor 3.0, I did notice an improvement in performance as the blog did load pretty smoothly and the change was noticeable. Below are the current loading times on desktop and mobile devices
Desktop
Mobile
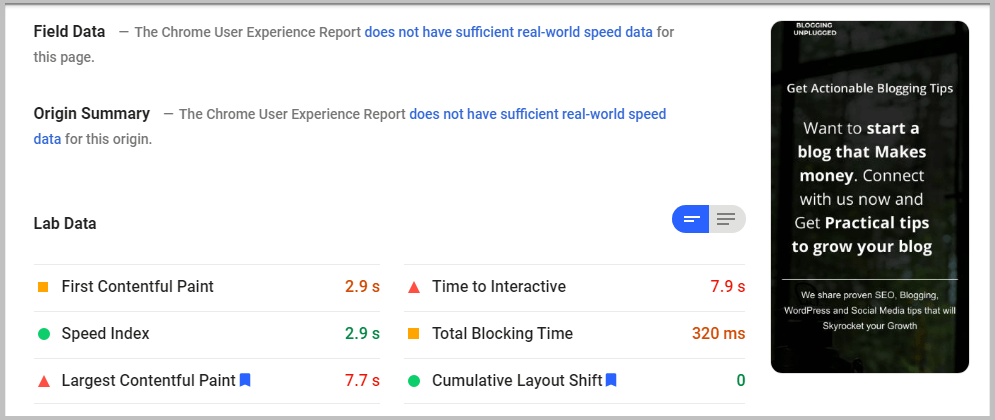
As you can see the loading times are pretty decent on both the devices.
And with that said, let’s take a look at some of the performance improvements in Elementor 3.0.
DOM Improvements
When you test page speed of your website, there are chances that you may have seen “Reduce the number of DOM elements” in GTMetrix and “Avoid an excessive DOM size” error in Google PageSpeed Insights.
If you are thinking what causes this error then the simple answer will be presence of excessive and unnecessary elements on the web page.
It is important to know when you create pages using any page builder then DOM can get excessively populated as these plugins use a lot of <div> or wrapper elements in the HTML output of the page making it slow loading.
Of-late, Elementor has been receiving a lot of feedback on the presence of unnecessary wrappers included in the page that were leading to increase of page size and negatively impacting the performance.
And acting on this Elementor has removed some of these elements which has lead to simplified output, easy understanding, improved readability, and a boost in page speed and performance.
Also, below is a list of wrapper classes that have been removed
.elementor-inner.elementor-row.elementor-column-wrap
For more details on this see Elementor’s Developer Document
Other Performance improvements in Elementor 3.0
If you are an Elementor user then I’m sure you are familiar with the fact that it lets you add dynamic elements to your page.
For example, if you visit any of the posts on this blog then you will find that the feature image is set as the background behind the title.
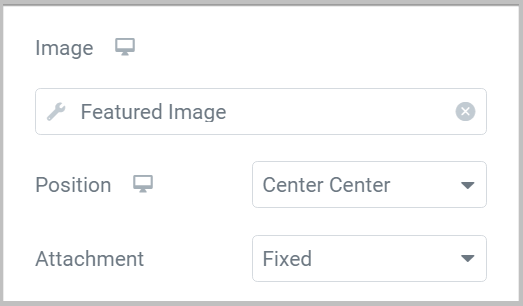
And the same goes for pages and archives as well.
In this scenario when a user visits a page on the website, Elementor scans it for the presence of any dynamic values and if found, it fetches them and then produces the output.
As you can see this process is long and resource hogging.
Keeping this in mind, in this update Elementor has improved this process by storing a list of dynamic values for every post.
Now, when someone visits the page, Elementor straight away fetches the value from this list which significantly reduces the length of the process, resource usages and in-turn it increases the page speed.
Having said that,
If you are struggling with page speed of your website then I will suggest
- Using a good cache plugin like WP Rocket
- Installing CDN
- Optimizing images
And on doing this you will definitely see an improvement in page speed.
Also, it is important to know, I have been using Elementor Pro for over a year now and have been using it alongside WP Rocket cache. This has tremendously improved the page speed of the blog. And you have seen the screenshot of the results above.
This concludes all the updates, improvements, and features that have been included in Elementor 3.0. If you are thinking about using Elementor for creating your site then I will highly recommend doing it. There are 2 versions of the plugin free and pro. You can download the free plugin using the link below
And in case you are looking to go for the pro version of the plugin then I have shared the plans below.
Elementor Pro Pricing Plans
[elementor-template id=”7617″]Other updates
- What’s new in Elementor Pro 3.5
- New features in Elementor Pro 3.4
- What’s new in Elementor 3.3
- What’s new in Elementor 3.4
- What’s new in Elementor Pro 3.1
- Everything you need to know Elementor 3.1
- New Elementor Pro Pricing update
- New Elementor seasonal kit for Black Friday
- Latest Astra Update- Membership plans rebranded
- Major Tailwind Create Update
- Elementor Pro License to include staging sites
- WordPress 5.7 Update
- What’s new in WordPress 5.6
- What’s new in WordPress 5.5
- Google NoFollow, Sponsored and UGC update
I hope you now know What’s new in Elementor 3.0. If you have any queries feel free to get in touch via the comment section or social media.
Do let us know which feature or improvement you like the most in this update. Also, if you find this article helpful then share this post with your friends and colleagues on social media.
Before you leave, feel free to check the best deals and discounts on Blogging tools and our Blogging and WordPress Glossary. Also, to stay up to date with our content, sign up for our newsletter, Join our Facebook group and follow us on social media.

Really thorough! I have just started using Elementor on my blog, and it’s proven to be really simple to get around.
Thank you Andrea Glad you liked it